Best Glue for LEGO ABS Repair - Solvent Welding Guide
📑 Table of Contents
LEGO bricks are injection-molded ABS (Acrylonitrile Butadiene Styrene), chosen for impact resistance and tight manufacturing tolerances that create the famous “clutch power.” When a part snaps, most glues add thickness, change the fit, and turn a precision part into a sloppy one.
This guide is LEGO and ABS specific, focused on solvent welding and small-part reinforcement and on choosing the best glue for ABS plastic. If you are repairing other plastics (PP, PE, PVC, acrylic), you need a different adhesive selection method because those materials do not respond like ABS.
Reddish-brown parts from the mid-2000s are notorious for “Brittle Brown Syndrome,” which is a chemistry and aging issue inside the plastic. Solvent welding can rejoin a break, but it cannot undo a part that is fundamentally embrittled.
ABS Solvent Welding vs. Adhesive (why LEGO is different)
Section titled “ABS Solvent Welding vs. Adhesive (why LEGO is different)”Adhesives like epoxy and cyanoacrylate (super glue) bond to the surface and leave a glue line. On LEGO, that glue line is not just cosmetic, it changes dimensions and can interfere with stud engagement, tube friction, and alignment.
Solvent welding uses a solvent to partially dissolve ABS at the fracture faces so the polymer chains mingle. As the solvent flashes off, the two halves re-solidify into one continuous piece, which preserves fit and usually looks cleaner than a glue layer.
ABS adhesive comparison table (what actually works on LEGO)
Section titled “ABS adhesive comparison table (what actually works on LEGO)”Use this table to pick a method based on what matters most: strength, appearance, clutch power, and whether you might ever want to reverse the repair—especially if understanding ABS plastic chemistry and restoration influences your decision.
| Product / Method | Bond type on ABS | Strength on LEGO parts | Aesthetics (gloss, haze, seam) | Clutch power impact | Reversibility | Best use cases | Main risks |
|---|---|---|---|---|---|---|---|
| Acetone (pure) | Solvent weld (shallow to moderate) | High if joint is tight and well-aligned | Very clean if sparing, can smear if over-brushed | Best chance to preserve tolerances | Moderate, can sometimes re-soften and separate with solvent | Hairline fractures, clean snaps, seams you want nearly invisible | Whitening, surface melt, softened details if flooded |
| MEK substitute (often ethyl acetate blends) | Solvent weld (often deeper, slower flash) | Very high on structural joints | Can look perfect, but over-application distorts edges fast | Preserves tolerances if controlled | Low to moderate, tends to bite deeper | Technic beams, load-bearing joins, “never come apart” repairs | Warping, sink marks, softened tubes and studs |
| Epoxy (2-part) | Adhesive layer | Medium to high in pure tension, lower in peel | Visible glue line, can yellow, squeeze-out is permanent | Often reduces fit because of thickness | Low | Internal reinforcement where thickness does not matter | Misalignment from clamp drift, permanent mess |
| Cyanoacrylate (super glue) | Brittle surface bond | Low in shear and peel | High risk of white bloom, frosting, and glossy damage | Often locks parts slightly off-size | Low | Emergency cosmetic tack on non-functional display parts | Blooming haze, sudden failure when snapped together |
Why super glue clouds LEGO bricks (and fails in use)
Section titled “Why super glue clouds LEGO bricks (and fails in use)”Cyanoacrylate cures in the presence of moisture and throws off fumes that deposit as a white haze called blooming or crazing. On glossy ABS, that haze telegraphs under light and is hard to remove without polishing, which usually lowers resale value and changes the factory sheen.
Even when the bond “feels” strong, super glue is weak in shear. The minute you twist the repaired piece while building, the bond line pops because the adhesive is brittle and the joint area is small.
The Pro Fix: acetone solvent welding (LEGO-safe technique)
Section titled “The Pro Fix: acetone solvent welding (LEGO-safe technique)”Solvent welding is the process of softening ABS at the fracture faces so they fuse into one piece as the solvent evaporates, a method commonly detailed in plastic solvent welding techniques.
- Dry-fit and index the break. Test the snap-up without solvent, then mark alignment with a pencil tick on the hidden side so you can hit the exact orientation fast.
- Prep the faces. Knock off loose plastic fuzz with a sharp hobby knife, then wipe the area with a dry lint-free cloth. Do not sand unless you must, sanding rounds the fracture and opens gaps.
- Load the brush lightly. Use a size 0 artist brush and pure acetone, then wipe the brush on the bottle lip until it looks damp, not dripping (roughly 1 to 2 drops in the bristles).
- Paint one side, wait for tack. Stroke the fracture face once or twice, then wait about 3 to 8 seconds. The correct cue is a slight shine and “grabby” tackiness, not a wet puddle.
- Paint the mating side and press. Brush the other half, immediately press the parts together hard with finger pressure for 30 to 60 seconds. If you see squeeze-out, stop and hold steady, do not wipe it while soft.
- Clamp only if needed, then leave it alone. For larger parts, use a rubber band or low-tack tape to hold alignment for 10 to 15 minutes. Set the piece aside to cure 24 hours before any clicking, twisting, or load.
Brush control is the whole game on LEGO. If you flood acetone, it wicks into studs and tubes, softens edges, and you end up with a slightly “mushy” brick that never feels right.
Making an ABS “slurry” for tiny gaps (optional)
Section titled “Making an ABS “slurry” for tiny gaps (optional)”If the break is chipped and you have a missing corner, you can thicken acetone with ABS to make a paste. Shave a little sacrificial ABS (a junk brick of similar color) into a glass jar, add a few drops of acetone, and wait until it becomes a syrup.
Apply the slurry with a toothpick as a gap filler, then solvent-weld the main faces normally. Expect a visible patch line on glossy parts, this is functional repair, not factory restoration.
Using MEK substitute for a permanent bond (when acetone is not enough)
Section titled “Using MEK substitute for a permanent bond (when acetone is not enough)”MEK was the old shop standard for ABS because it bites aggressively and forms a deep weld. Many regions restrict true MEK due to toxicity, so hardware stores sell “MEK substitute,” commonly based on ethyl acetate or blended ketones.
Compared to acetone, MEK substitute typically stays wet longer and penetrates deeper, which can build a stronger weld on thick sections. The tradeoff is higher risk of detail loss, warping, and sink marks, especially around studs, tubes, and thin walls.
Use MEK substitute when the part will see sustained stress, like Technic beams, brackets that carry weight, or older brittle parts you are stabilizing for display. Plan on a longer “no-touch” window, with gentle handling after a few hours and full strength closer to 24 to 48 hours depending on ventilation, temperature, and how much solvent you used.
Failure risks are usually operator-driven. If you over-apply, the softened zone expands beyond the joint, the part can slump out of square, and you lock in a permanent misalignment.
Repairing snapped pegs and clips (what holds, what does not)
Section titled “Repairing snapped pegs and clips (what holds, what does not)”Clips, minifigure hands, and bar-grip elements fail because they are spring features. A straight butt-joint repair almost always fails the first time you flex the clip open.
The fix is reinforcement, either by pinning (a hidden mechanical “bone”) or by splinting (adding a small ABS strap) depending on the part geometry.
Pinning method (internal reinforcement)
Section titled “Pinning method (internal reinforcement)”Pinning works best when there is enough material thickness to drill without breaking through the sidewall. On most clips, you are working in the 0.5 mm to 1.0 mm drill range, so a pin vise is mandatory, a power drill will wander.
Visualize it like this, you are creating a tiny dowel joint across the fracture:
[ clip half ]=={metal pin}==[ clip half ]
Practical limits: if the clip wall is paper-thin or the break is right at the flex hinge, pinning can split the part. In those cases, replacement is often the better move.
Splint method (external strap on hidden faces)
Section titled “Splint method (external strap on hidden faces)”If the broken area is too thin to drill, you can solvent-weld a sliver of ABS across the backside as a strap. Cut a strip from a sacrificial brick, pre-fit it so it does not interfere with function, then weld it with acetone or MEK substitute.
A strap adds thickness, so keep it on a non-mating surface. On anything that must slide into a tight clearance, straps can cause binding.
When NOT to repair LEGO (replacement is the pro call)
Section titled “When NOT to repair LEGO (replacement is the pro call)”Some repairs cost more in value and function than they save. If any of the points below apply, replacement is usually safer, cleaner, and more collectible-friendly.
- High-stress, safety, or load parts: suspension arms, Technic drivetrain parts, large cantilevered brackets, anything a child will aggressively flex. Solvent welds can be strong, but the surrounding old plastic may be the weak link.
- Rare, high-value parts where originality matters: vintage minifigure torsos, printed elements, rare colors, or collectible parts where any solvent mark reduces value. If you must stabilize, do it for display and document the repair.
- Crumbled or chemically brittle plastic: the brittle-brown style “glass snap” failure mode means the whole part is compromised. You can weld one break and it will crack next to your weld later.
- Missing material in functional areas: if a stud, axle socket, tube, or clutch surface has chunks missing, you can patch it, but it will not behave like factory geometry.
LEGO repair troubleshooting guide (diagnose and fix the failure)
Section titled “LEGO repair troubleshooting guide (diagnose and fix the failure)”Most “bad repairs” come down to five shop problems: contamination, gaps, misalignment, over-melt, or wrong adhesive for the stress.
| Symptom | Likely cause | Corrective action |
|---|---|---|
| Bond pops off cleanly with a fingernail | Surface contamination (hand oils), too little solvent, no true weld | Re-break if needed, degrease with warm dish soap and dry fully, re-weld with controlled solvent and longer press time |
| Joint is stuck but weak when twisted | Butt-joint on a flexing part, not enough joint area | Add pinning or an ABS strap, or replace the part if it must flex repeatedly |
| Part fused misaligned | No dry-fit indexing, clamped while too soft, solvent flooded | If fresh, re-soften carefully and re-seat, otherwise accept it for display or replace, do not force it into assemblies |
| Studs or details look “melted” | Over-application, solvent wicked into features | Stop using brushes that carry too much solvent, switch to micro-brushes, apply from inside faces where possible |
| White haze around repair | Cyanoacrylate bloom, or solvent stress on glossy surface | Avoid super glue, for solvent haze reduce application and airflow-dry fast, light polishing is possible but changes factory finish |
| Cracks reappear next to the joint weeks later | Underlying plastic is embrittled (age, UV, brittle batches) | Treat as display-only, reduce load, replace for functional builds |
Long-term care after repair (how to keep it from failing again)
Section titled “Long-term care after repair (how to keep it from failing again)”Solvent welds gain strength as solvent fully evaporates and the polymer re-hardens. Handle gently after 1 to 2 hours, but do not snap the part into a build or apply torsion for a full 24 hours, and give thicker sections 48 hours if you used MEK substitute or slurry.
Load limits matter. A repaired part is usually fine in compression and light shear, but repeated flexing and peel loads are the killers, especially on clips, hinge plates, and minifigure accessories.
If the model is for display, avoid direct sunlight and heat, both accelerate aging and can re-introduce stress cracking around repaired zones. For play builds, teach the joint to work with the load, avoid twisting a repaired plate off a baseplate, separate it with a brick separator to reduce shear at the repair line.
Why white stress marks appear on bricks
Section titled “Why white stress marks appear on bricks”When ABS is bent past its yield point, it forms micro-fractures that scatter light, showing up as white stress marks (crazing). You can sometimes reduce the appearance with gentle warmth from a hair dryer, but the structural damage is permanent.
Treat stress whitening as a failure warning. If a clip or hinge is already whitening, it is a candidate for replacement before it snaps mid-build.
Restoring clutch power of old bricks (what helps and what does not)
Section titled “Restoring clutch power of old bricks (what helps and what does not)”Clutch power loss is usually surface wear or contamination. You cannot reliably add plastic back to studs without ruining tolerances.
Cleaning often helps more than people expect. Soak loose bricks in warm water with mild dish soap, agitate, rinse well, then air dry completely before testing fit.
Related care tips (keep this separate from repair work)
Section titled “Related care tips (keep this separate from repair work)”Dust removal is safest with a soft makeup brush that reaches between studs without scratching the gloss. For packed dust in crevices, a mini vacuum with a brush tip works better than canned air, which just relocates grime.
If you have permanent marker on ABS, do not use acetone. Use a dry-erase marker over the permanent ink, wipe, and repeat until clean.
For detail cleaning in tubes and corners, use a plastic dental pick or a sharpened toothpick. If you must use metal, wrap the tip with masking tape so you do not gouge the sidewalls.
Retrobrighting yellowed LEGO and avoiding UV damage
Section titled “Retrobrighting yellowed LEGO and avoiding UV damage”White and light gray ABS can yellow from UV exposure and brominated flame retardants in the plastic. Retrobrighting uses hydrogen peroxide (often around 12%) and UV light to shift color back, but it needs monitoring because overexposure can cause marbling or increased brittleness.
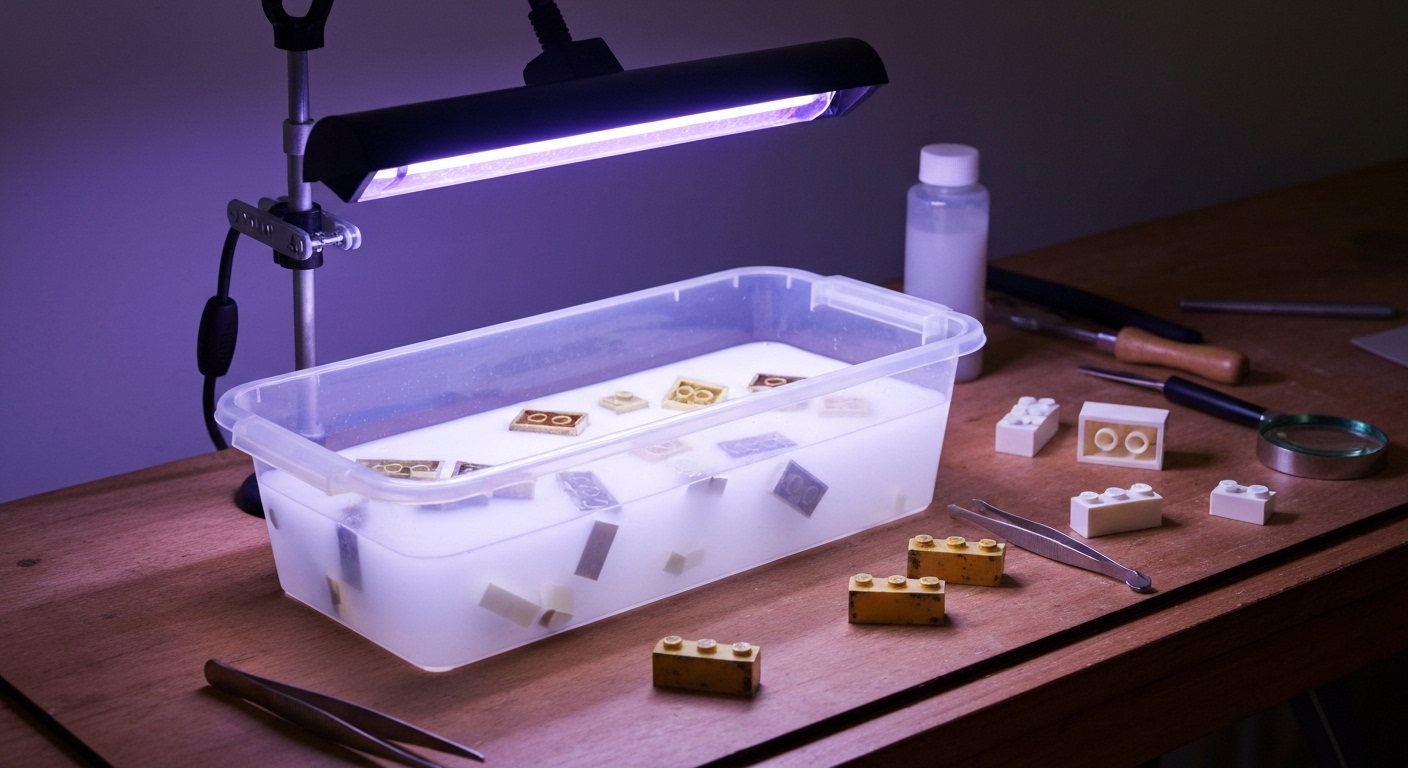
UV damage is cumulative, even indirect sun through a window adds up. Store loose parts in opaque bins, use UV-blocking film in display rooms, and favor LED lighting over fluorescent or halogen sources.
Identifying fake LEGO with a solvent test (material reality check)
Section titled “Identifying fake LEGO with a solvent test (material reality check)”Most genuine LEGO is ABS and will show a controlled tack when touched with acetone on an inconspicuous internal surface. Many counterfeit bricks use different blends that react differently, either not softening at all or turning gummy in an unpredictable way.
Do not do this test on visible surfaces. A quick touch inside a tube or underside can confirm whether solvent welding is even a viable repair approach.
Safety (shop rules for solvents)
Section titled “Safety (shop rules for solvents)”Acetone and MEK substitutes are VOCs, respiratory irritants, and highly flammable. Work with cross-ventilation, keep away from sparks and open flame, and use an organic vapor respirator if you are doing more than a quick touch-up.
Do not store solvent-wet brushes. Rinse immediately, reshape bristles, and cap solvents tightly so they do not water-contaminate and behave inconsistently.
FAQ: can you glue LEGO?
Section titled “FAQ: can you glue LEGO?”Yes, but “should you” depends on the goal. For functional LEGO repairs, solvent welding is the closest thing to a factory-correct fix because it fuses ABS without adding a thick glue layer that ruins tolerances.
Super glue is best avoided on glossy ABS because it blooms and fails in shear. Epoxy can work for hidden reinforcement where thickness does not affect fit, but it is rarely the right primary bond for LEGO geometry.
The LEGO restoration kit (core tools)
Section titled “The LEGO restoration kit (core tools)”Use a small, repeatable kit so your repairs are consistent. Pure acetone, a size 0 brush, a pin vise with micro bits, and a couple of sacrificial ABS bricks for slurry and splints will cover most break types.
References
Section titled “References”- Safety of ABS Plastic. 3D Printing Industry/Chemical analysis. Properties of Acrylonitrile Butadiene Styrene.
- Solvent Cementing of Plastics. Plastic Pipe and Fittings Association. Principles of chemical welding.
- The “Brittle Brown” Phenomenon. BrickLink/Eurobricks Forums. Community documentation of mid-2000s reddish-brown ABS failure.
- Retr0bright Wiki. Open source chemistry guide for restoring yellowed plastics.
- LEGO Care Guide. Official LEGO Customer Service. Maintenance and cleaning recommendations.