Cleaning Sticky Rubberized Plastic - Restoring Old Gadgets
📑 Table of Contents
Old cameras, mice, binoculars, remotes, game controllers, and audio recorders all age the same way. That once premium soft-touch finish turns into black goo that smears, grabs lint, and leaves residue on your fingers.
This is not grime sitting on top of the coating. The coating itself is decomposing, so “cleaning” it is like trying to wash away wet paint. For non-electronic items, see the general master guide at /fixes/fix-sticky-rubberized-plastic-coatings.
How to Fix Sticky Rubberized Gadgets (Quick Answer)
Section titled “How to Fix Sticky Rubberized Gadgets (Quick Answer)”- Wipe-test the surface, if black residue transfers easily, plan to strip, not “clean.”
- Use 91% to 99% isopropyl alcohol on a cloth (not poured), scrub until the black transfer stops.
- Detail tight areas with dampened swabs, keep liquids away from seams, buttons, and ports.
- Avoid hot solvents (acetone, lacquer thinner), they can craze ABS and fuse button plastics.
What’s happening to the coating (and why tech is hit hardest)
Section titled “What’s happening to the coating (and why tech is hit hardest)”Most rubberized “soft-touch” gadget finishes are polyurethane (PU) or PU blends sprayed over ABS or polycarbonate housings. The feel is great, but the chemistry is not forever.
PU is hygroscopic, it absorbs moisture from air. Over time, hydrolysis cleaves polymer chains, lowering molecular weight until the surface turns tacky and then genuinely gummy.
Electronics accelerate the process because of heat cycling. Warm use, cool storage, repeated for years, stresses the coating and pulls in moisture, especially in closed camera bags and foam cases that trap humidity.
Once a device is in the sticky stage, it does not “re-harden.” The only durable fix is removing the failed coating or isolating it with a temporary powder barrier.
Comparison of Cleaning Methods for Rubberized Tech (Quick-reference)
Section titled “Comparison of Cleaning Methods for Rubberized Tech (Quick-reference)”| Method | Effectiveness on PU goo | Risk to electronics and markings | Permanence | Best use case |
|---|---|---|---|---|
| 91% to 99% IPA wipe | High, controllable strip | Low to medium (can dull gloss, remove ink) | Permanent once coating is fully removed | Most gadget housings and grips |
| Baking soda paste | Medium, slower | Low (mess risk near seams) | Permanent if you fully abrade coating | Solvent-sensitive plastics, fog-prone finishes |
| Magic Eraser (melamine) | Medium to high on residue | Medium to high (will abrade logos, textures) | Permanent, but can change sheen | Final haze, last sticky film after IPA |
| Powders (cornstarch, talc) | Low to medium (masking) | Low | Temporary (weeks to months) | Collectibles, when you will not strip |
Solvent safety for electronics (what I do in the shop)
Section titled “Solvent safety for electronics (what I do in the shop)”Isopropyl alcohol is flammable, and its vapor builds up fast in small rooms. Work with cross-ventilation, keep ignition sources away, and do not use a heat gun to “speed it up.”
Wear nitrile gloves because degraded PU is a persistent skin contaminant and IPA will de-fat your skin. Eye protection matters too, sticky slurry flicks off towels and toothbrushes.
Protect the internals like you actually care about the device. Power off, remove batteries, pull memory cards, and keep liquids out of seams, ports, and button gaps.
Never flood a gadget. Apply IPA to the cloth or swab, then work the surface, and immediately dry-buff with a clean towel so solvent does not creep into switch membranes or along case joints.
If you must work near openings, mask them. Painter’s tape over ports and button perimeters buys you a lot of safety, especially on old cameras where the rubber gets close to control wheels, and it also helps when you’re cleaning textured and soft-touch plastic surfaces that can easily trap residue around those edges.
The Alcohol Strip (91% IPA), the electronics-focused method
Section titled “The Alcohol Strip (91% IPA), the electronics-focused method”Use 91% or 99% IPA. The common 70% rubbing alcohol has too much water, it works slower, and that extra dwell time increases the chance of seepage into seams.
Start with a small test patch on the back or underside. Some device logos, serial number inks, and soft-touch paint layers will lift, so decide early if you care about markings for resale.
Wet a folded microfiber or paper towel until it is damp, not dripping—this approach works especially well for residue that forms for the same reasons discussed in why old TV remotes get sticky. Scrub with firm, consistent pressure, and rotate to a clean section constantly because the black slurry just re-smears if you keep using a dirty face.
Timing expectations help you avoid overworking and scuffing. A mouse shell side panel is often 5 to 15 minutes per side, a camera grip can be 20 to 45 minutes depending on texture and how deep the goo layer is.
You stop when the black transfer drops to near-zero and the surface feels hard, not rubbery. If you keep scrubbing past that point, you can burnish the base plastic into a patchy shine or haze, especially on textured ABS.
For creases and tight radii, use swabs or a soft nylon detailing brush lightly dampened with IPA. Keep the device oriented so gravity pulls solvent away from gaps, I often work with the item tilted so seams point down.
After stripping, wipe once with a water-damp cloth to pick up residue, then dry immediately. Do not soak, the goal is residue pickup, not rinsing.
Buttons, scroll wheels, and seams (where people kill devices)
Section titled “Buttons, scroll wheels, and seams (where people kill devices)”Buttons fail when solvent wicks under caps and attacks lubricants, membranes, or adhesive layers. The fix is control, not force.
Dampen a swab, then roll it across the button top, do not push liquid toward the edges. If the coating on the button sides is gummy, I prefer to disassemble the device and remove caps if possible, otherwise you risk driving slurry into the switch.
If the device is valuable, treat this like restoration, not cleaning. Photograph markings first, mark screw locations, and consider a teardown so you can clean caps off-device and keep solvents away from the PCB.
Baking soda paste (abrasive strip when solvents are a bad idea)
Section titled “Baking soda paste (abrasive strip when solvents are a bad idea)”Baking soda paste works because it is a mild abrasive, plus the alkaline slurry helps break down degraded PU at the surface, making it a practical option when trying to fix sticky rubberized plastic coatings. It is slower than IPA, but it is less likely to attack inks and less likely to fog plastics that react poorly to solvents.
Mix a thick paste with minimal water. Scrub with a toothbrush in small circles, wipe the slurry away frequently, and keep the paste out of seams so it does not pack into button gaps.
This method is messy, so I use it on housings I can remove or on devices with generous sealing. Follow with a damp wipe and immediate dry-buff.
Magic Eraser for final residue (and why it can bite you)
Section titled “Magic Eraser for final residue (and why it can bite you)”Melamine foam (Magic Eraser) is micro-abrasive, basically ultra-fine sanding in sponge form. It shines at removing the last thin sticky film after IPA, especially on flat panels.
Use it barely damp and use light pressure. Keep it away from printed icons, rubberized legends, and serial labels because it will erase them, and it can change the sheen of matte plastics.
If you need a deeper overview of melamine behavior and wear, see Melamine.
Powders for a temporary “non-sticky” surface (when you will not strip)
Section titled “Powders for a temporary “non-sticky” surface (when you will not strip)”Cornstarch or talc can make a sticky grip handleable by binding to the degraded surface polymers. It is a band-aid, not a restoration.
Apply a light dusting, then work it in with a soft brush, and wipe off excess. Expect the stickiness to creep back as the PU continues breaking down and the powder loads up with oils.
On tech, powders create their own risks. Fine powder migrates into scroll encoders, switches, and lens rings, so keep this method for items you will not operate heavily, or isolate the treated surface from moving parts.
Why Goo Gone can melt the base plastic (solvent compatibility hierarchy)
Section titled “Why Goo Gone can melt the base plastic (solvent compatibility hierarchy)”Goo Gone and similar removers often rely on d-limonene (citrus terpene) and petroleum distillates. They can remove rubberized coatings quickly, but they also soften, swell, or craze common gadget plastics.
ABS and polycarbonate are especially vulnerable to “hot” solvents. Even if the plastic does not fully melt, you can end up with whitening, stress cracking, a gummy surface, or permanently softened button caps.
Here’s the hierarchy I use for gadget housings, from safer to never. IPA (91% to 99%) is usually safest, then mild soap and water for final wipe-down, then cautious spot use of citrus-based removers, and never acetone, lacquer thinner, MEK, or aggressive adhesive removers on assembled electronics.
If you insist on a citrus remover, treat it like a controlled chemical strip. Apply to a cloth, not the device, use brief contact time, and stop as soon as the rubber lifts, then immediately clean the area with mild soapy water on a damp cloth and dry-buff.
What you should see after stripping (the “naked” substrate)
Section titled “What you should see after stripping (the “naked” substrate)”Once the soft-touch layer is gone, you usually reveal glossy ABS or a slightly satin polycarbonate. That base plastic is the structural shell, and it will not turn sticky again because it is not the failing PU coating.
Cosmetically, expect a texture change and sometimes a slight color shift where the original coating hid molding marks. If resale value matters, document the restoration honestly, buyers prefer clean bare plastic over a gummy mess.
Restoring grip on a stripped gadget
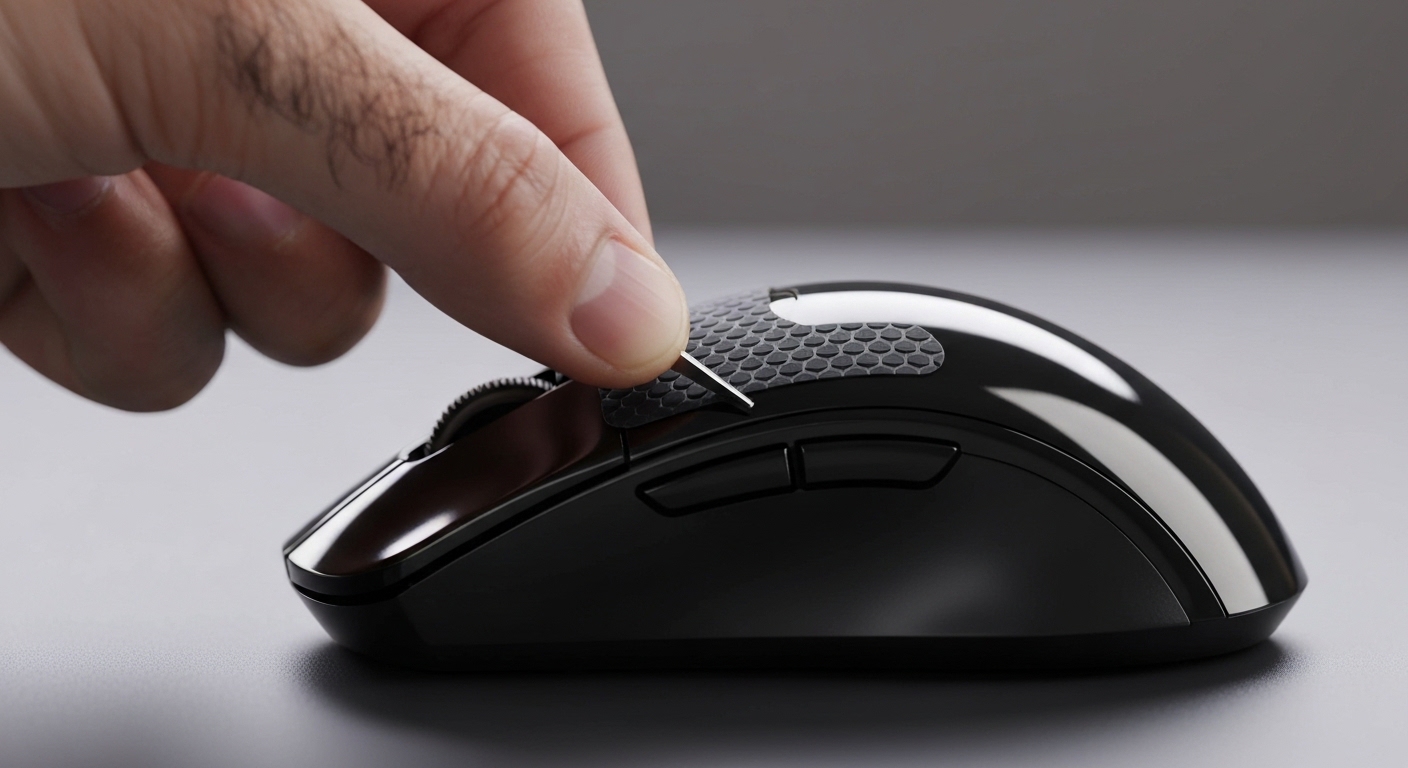
Section titled “Restoring grip on a stripped gadget”If you miss the grip, add grip tape or a quality elastomer overlay designed for controllers and mice. You are swapping a failing coating for a stable mechanical surface with an adhesive layer you can replace later.
Degrease the stripped plastic with IPA, let it fully flash off, then apply tape with firm pressure and trimmed edges. Rounded corners last longer because they resist peel when the device is pocketed.
Long-term prevention for tech devices (numbers that actually work)
Section titled “Long-term prevention for tech devices (numbers that actually work)”Hydrolysis needs moisture, so humidity control is the long game. For storage, target 35% to 45% relative humidity (RH), and avoid sustained storage above 55% RH if you want soft-touch finishes to survive.
Do not seal rubberized gadgets in airtight plastic bins unless you are controlling humidity inside the bin. A breathable fabric bag in a conditioned room beats a “Tupperware trap” in a garage.
Silica gel works, but only if you treat it as a consumable. Use indicating silica packs when possible, regenerate or replace them when they change color, and as a rule check them every 30 to 60 days in humid climates, every 3 months in dry climates.
For camera bags and hard cases, add enough desiccant to matter. A single tiny packet is overwhelmed quickly, so use larger packs sized for the case volume, and do not bury them under foam where they cannot exchange air.
Handling habits matter because skin oils and lotions accelerate degradation. Wipe grips with a slightly damp microfiber after heavy use, then dry, and avoid leaving devices on warm surfaces like cable boxes, radiators, or sunny windowsills.
Inspection intervals keep you ahead of the goo stage. Check stored devices every 6 months, and if you feel the first hint of tackiness, clean oils off and move storage to lower RH before the coating collapses.
FAQ (myths I hear at the bench)
Section titled “FAQ (myths I hear at the bench)”Can the coating re-harden if I leave it alone?
Section titled “Can the coating re-harden if I leave it alone?”No. Once PU has hydrolyzed to the sticky stage, the polymer chains are broken, and it will continue to soften and smear until removed.
Is the sticky residue toxic?
Section titled “Is the sticky residue toxic?”It is not typically an acute poison, but it is a contamination problem. It holds dirt, skin cells, and bacteria, and it transfers to your face, lens cloths, and other gear.
Does heat help remove it faster?
Section titled “Does heat help remove it faster?”Heat makes the goo softer and can speed wiping, but it also increases solvent vapor and can warp plastics or loosen adhesives. On electronics, I avoid heat and use mechanical action with controlled IPA instead.
Will this damage resale value?
Section titled “Will this damage resale value?”A gummy device is already devalued. A cleanly stripped housing often improves usability and saleability, but removing printed markings can hurt, so test and work slowly around labels.
References
Section titled “References”- Polyurethane Hydrolysis. Journal of Cellular Plastics. Chemical mechanism of polymer degradation in high humidity.
- Solvent Compatibility of ABS. Plastic Material Data Sheets. Safety of Isopropyl Alcohol on consumer electronics housings.
- Restoring Sticky Rubber. Instructables/iFixit. Community guides for specific device restoration (cameras, mice).
- Toxicology of PU Degradation Products. EPA Chemical Data. Risks of skin contact with degraded polymers.
- Desiccants and Storage. Library of Congress Preservation. Controlling relative humidity to prevent material decay.