Removing Sticker Residue from Gaming Console - PS5 and Xbox Plastic Care
📑 Table of Contents
This Guide Is Console-Specific
Section titled “This Guide Is Console-Specific”This process is built for heat-sensitive, textured, electronics-adjacent plastics found on PS5 and Xbox housings, faceplates, and vent surrounds. These finishes mark and gloss up faster than most household plastics, and vents add a deformation risk when heat is used.
If you need a general-purpose residue guide for tougher household plastics, use the acrylic-safe approach in acrylic care instead.
The Sticky Badge of Previous Ownership
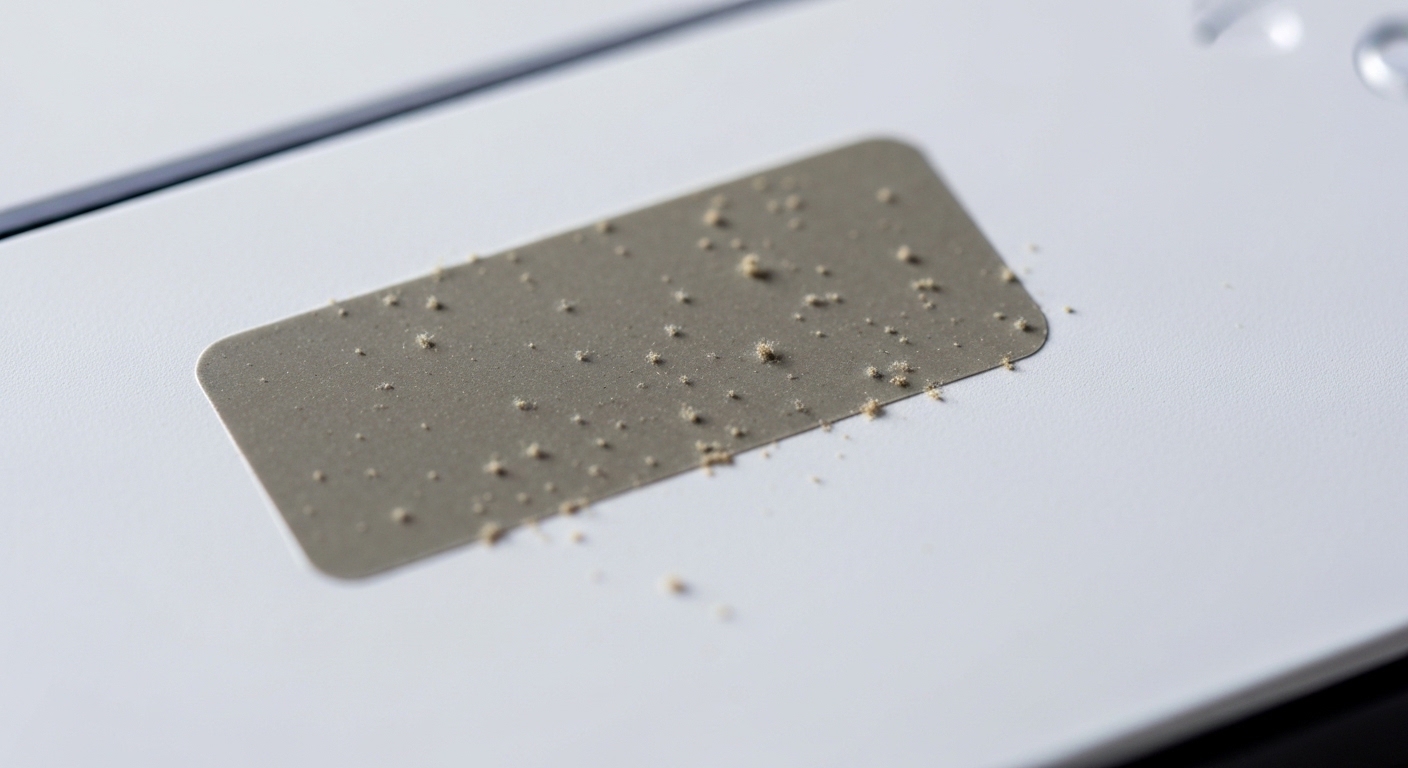
Section titled “The Sticky Badge of Previous Ownership”Secondhand consoles often come with the gummy outline of price tags, kid stickers, or shipping labels. That residue grabs dust, oils, and skin grime, so even a clean console looks tired.
Sticker adhesive gets harder to remove the longer it sits, especially after warm gaming sessions or sun exposure. The goal is to lift the adhesive without changing the console’s texture, sheen, or color.
Safety Notes (Do This Before You Touch the Residue)
Section titled “Safety Notes (Do This Before You Touch the Residue)”Power the console off and unplug it, then let it cool to room temp. Work on a stable bench with good light, and keep liquids out of ports, seams, and vents.
Use microfiber or clean cotton, not paper towels (they scratch gloss and burnish matte). If you are in very dry air, touch a grounded metal object before handling the console, and avoid rubbing fast with synthetic cloth that can build static.
PS5 and Xbox Plastic Textures (Why Console Plastics Are Touchy)
Section titled “PS5 and Xbox Plastic Textures (Why Console Plastics Are Touchy)”PS5 faceplates combine glossy and matte surfaces, and the matte black interior plastics can show “polished” spots if you rub too hard. Xbox Series X and S housings are mostly matte with patterned areas that trap residue down in the texture.
On textured matte plastic, sticker glue sits in the valleys. Heavy pressure smears it deeper, and stronger solvents can melt the microtexture that makes the surface look matte.
Safest Way to Remove Sticker Residue from a PS5 or Xbox
Section titled “Safest Way to Remove Sticker Residue from a PS5 or Xbox”- Dry lift first: Pick off any raised chunks with a fingernail or plastic edge, then dab with fresh tape to pull loose tacky bits.
- Oil dwell: Apply a small amount of cooking oil or mineral oil, let it dwell 15 to 30 minutes, then wipe by rolling the residue off the surface.
- Warm and lift (optional): Use a hairdryer on low, warm the area while moving continuously, then lift softened adhesive with a plastic card.
- Targeted solvent step: If residue remains, spot-test and use a small amount of Goo Gone or isopropyl alcohol on a cloth, not directly on the console.
- Final clean: Wash away oily remover film with a lightly dampened cloth and a drop of mild dish soap, then dry completely before powering on.
Adhesive Remover Comparison Table (Console Plastic Risk vs Results)
Section titled “Adhesive Remover Comparison Table (Console Plastic Risk vs Results)”| Method | Effectiveness on old residue | Risk on matte console plastics | Best use on PS5/Xbox | Notes |
|---|---|---|---|---|
| Cooking oil or mineral oil | Medium | Low | First-line for housings and faceplates | Needs dwell time, wipe by “rolling” residue, then degrease with dish soap |
| Goo Gone (citrus/petroleum blend) | High | Medium | Stubborn spots after oil fails | Use sparingly, short dwell, keep off vent openings, remove oily film afterward |
| Isopropyl alcohol (IPA) | Medium | Medium to High | Final film removal, seam grime | Can haze or whiten some plastics, spot-test and limit contact time |
| Hairdryer heat | Medium to High | Medium | Thick adhesive blobs, label edges | Heat can warp vent grilles and soften textures if overheated |
Step-by-Step: Safest Sticker Residue Removal for PS5 & Xbox (Least to Most Aggressive)
Section titled “Step-by-Step: Safest Sticker Residue Removal for PS5 & Xbox (Least to Most Aggressive)”Step 1: Dry removal and tape-lift
Section titled “Step 1: Dry removal and tape-lift”Start by removing any sticker backing that is still present. Use a fingernail or the corner of a plastic card, and keep the angle low so you do not gouge.
For remaining tacky glue, press fresh packing tape or painter’s tape onto the residue, then snap it off quickly. Repeat with clean sections until transfer slows, since dirty tape just smears.
Step 2: Oil method (console-safe baseline)
Section titled “Step 2: Oil method (console-safe baseline)”Use a drop of cooking oil (vegetable or olive) or mineral oil on a microfiber cloth, then dab it onto the residue rather than flooding the area. Let it dwell 15 to 30 minutes, and for older adhesive go 45 minutes with a second small application.
Wipe by rolling the adhesive off with light pressure, instead of scrubbing, which burnishes matte plastic and drives glue into texture—especially on surfaces prone to issues like sticky rubberized plastic coatings. Once the residue is gone, remove the oil film with a cloth dampened with warm water and a tiny amount of dish soap, then dry.
Step 3: Heat method (for thick glue or label edges)
Section titled “Step 3: Heat method (for thick glue or label edges)”Use a household hairdryer on low or medium, held 6 to 8 inches away, and keep it moving. As a shop rule, if the plastic is too hot to keep your finger on comfortably, you are already past safe.
Avoid heating vent areas and grille patterns aggressively because thin plastic ribs deform first. Warm the adhesive, lift with a plastic card, then go back to oil for the thin film.
Optional tool note (plastic edge only)
Section titled “Optional tool note (plastic edge only)”A plastic card, guitar pick, or detailing squeegee works well. If you use a plastic razor, keep it for flat glossy areas only, and do not chase residue into textured matte where the blade can snag.
Step 4: Goo Gone (spot treatment only)
Section titled “Step 4: Goo Gone (spot treatment only)”If oil does not touch it, Goo Gone is the next step, but treat it like a controlled solvent, not a general cleaner. Put a small amount on a cloth or cotton swab, dab only the residue, and keep dwell time short (about 30 to 90 seconds), then wipe.
Do not let it run into seams, button gaps, or vents. After removal, wash the area with mild dish soap and water on a cloth to strip the oily carrier so it does not attract dust.
Step 5: Isopropyl alcohol (final cleanup with caveats)
Section titled “Step 5: Isopropyl alcohol (final cleanup with caveats)”IPA is best for removing the last faint smear or oily film when the adhesive itself is already gone. Apply to the cloth, not the console, wipe quickly, and then stop.
If you see whitening, hazing, or a texture change, discontinue immediately. That is typically surface attack or solvent crazing, and it can become more visible after the alcohol fully evaporates.
Goo Gone vs Cooking Oil (Dwell Time and Wipe Technique)
Section titled “Goo Gone vs Cooking Oil (Dwell Time and Wipe Technique)”Oil is slower, but it is typically safer on ABS and PC-ABS console blends because it works by softening and lubricating rather than actively solvating the plastic surface. Expect 15 to 30 minutes dwell for moderate residue, and up to 45 minutes for older glue, then remove by rolling it off with light pressure.
Goo Gone is faster on aged adhesive because its solvent package breaks the bond more aggressively. Keep dwell tight (30 to 90 seconds on a test spot), wipe away, then immediately follow with a mild soap wipe so the citrus-oil carrier does not keep migrating across matte texture.
Safety of Solvents on Matte Plastic (What Not to Use)
Section titled “Safety of Solvents on Matte Plastic (What Not to Use)”Matte finishes are microscopic texture, and “shiny spots” happen when you dissolve or flatten that texture. Once you gloss up a patch, you cannot clean it back to matte without refinishing.
Avoid these on matte PS5 or Xbox housings: acetone, MEK, lacquer thinner, paint thinner, xylene, toluene, brake cleaner, strong adhesive removers meant for metal, and high-percentage denatured alcohol blends with unknown additives. If you are unsure what is in a product, do not put it on a console.
If you need background on whitening and crazing behavior, see the mechanics of plastic crazing before you risk a visible panel.
Common Mistakes That Permanently Damage Console Plastics
Section titled “Common Mistakes That Permanently Damage Console Plastics”These are the failures I see most in the shop, and they are usually one-step mistakes.
- Overheating vents and grilles: Heat warps thin ribbing first, and the deformation is permanent.
- Scrubbing matte texture: Heavy pressure turns matte into glossy “polished” spots that look like stains but are actually texture loss.
- Spraying remover directly on the console: Liquids wick into seams, ports, and buttons, then soften adhesives or leave residue inside.
- Using acetone or aggressive thinners: They can melt, craze, or permanently haze PC-ABS blends.
- Chasing perfection with alcohol: Repeated IPA passes can turn a minor smear into a large hazed patch.
Cleaning the Vent Plastic (Without Pushing Dirt Inside)
Section titled “Cleaning the Vent Plastic (Without Pushing Dirt Inside)”Use compressed air in short bursts, aimed to drive dust out of the vent structure rather than deeper into the console. Hold the can upright to avoid propellant spit, and do not spin fan blades at high speed if you can see them through a vent.
For stuck debris around vent edges, use a soft brush and a barely damp swab. If you use IPA here, keep it minimal and away from openings so it evaporates before it can migrate.
Removing Ghosting Marks (When the Sticker Shape Is Still There)
Section titled “Removing Ghosting Marks (When the Sticker Shape Is Still There)”If the adhesive is gone but a perfect sticker outline remains, that is usually UV differential aging. The sticker shielded the plastic, so the exposed area faded or yellowed around it.
Cleaning will not remove ghosting because it is not contamination. Options are living with it, replacing the panel, or committing to a full-color correction process, which is its own risk category on assembled electronics.
Can I Use This Method on Controllers, Headsets, or Other Tech Plastics?
Section titled “Can I Use This Method on Controllers, Headsets, or Other Tech Plastics?”Use the same “least aggressive first” logic, but tighten the liquid control because controllers and headsets have more seams, rubber parts, and thin coatings. Oil and Goo Gone can creep into joystick modules, trigger pivots, and microphone ports, so keep those products off anything with openings.
For controllers, stick to tape-lift, minimal heat away from buttons, and very light IPA on a cloth for final film. For seam grime, floss and swabs work, but keep moisture low and dry fully before use.
When to Stop and Accept Cosmetic Damage
Section titled “When to Stop and Accept Cosmetic Damage”If you are restoring a collector console, stop when the next step risks texture change, haze, or glossing. A faint adhesive shadow is usually less noticeable than a polished patch on matte plastic, especially under angled light.
If you are a casual user, you can accept slightly higher risk for a cleaner look, but set a limit. If two controlled cycles of oil plus a single short solvent attempt do not move it, you are likely dealing with aged, cross-linked adhesive that is bonded down in the texture.
Preventing Future Residue (No More Sticker Problems)
Section titled “Preventing Future Residue (No More Sticker Problems)”The best prevention is keeping stickers off the console housing entirely, especially on matte areas and vent surrounds. If you must label, use removable painter’s tape on a hidden underside area, or label a removable cover or stand instead of the console shell.
Remove any new sticker within days, not months, because adhesive aging accelerates with heat from operation; if residue remains, follow guidance on safe solvent selection for plastic to avoid damage. For long-term identification, use removable vinyl decals rated for clean release, or a hang tag tied to a cable rather than adhesive on plastic.
References
Section titled “References”-
Sony Interactive Entertainment. “PlayStation 5 Care and Cleaning Guide.” Manufacturer documentation.
-
Microsoft Corporation. “Xbox Series Console Maintenance Guidelines.” Manufacturer documentation.
-
3M Corporation. “Pressure Sensitive Adhesive Chemistry Guide.” Technical documentation on adhesive formulations, including practical considerations for removing sticker residue from plastic.
-
American Chemical Society. “Solvent Compatibility with Common Plastics.” Research on plastic-solvent interactions.
-
Consumer Electronics Association. “Safe Cleaning Practices for Gaming Equipment.” Industry guidance.
-
Journal of Applied Polymer Science. “Surface Modification of ABS and Polycarbonate.” Research on plastic surface treatments.