Cleaning Plastic Vent Covers Registers - Cleaner Air and Whiter Vents
📑 Table of Contents
ABS vs. Steel-Look Plastic
Section titled “ABS vs. Steel-Look Plastic”HVAC vent covers, often called registers, are made from different materials depending on budget, style, and moisture exposure. Many modern homes use plastic vents because they do not rust and are lightweight and affordable. Most white plastic vents are made from High-Impact Polystyrene or Acrylonitrile Butadiene Styrene, both durable but prone to yellowing as they age.
Some vents only look like metal. Steel-look or metallic finish vents are usually plastic underneath, coated with foil or metallic paint. This distinction matters because solid white ABS can be scrubbed firmly, while coated vents can lose their finish with even gentle abrasion.
To check what you have, try a magnet on a hidden edge. If it does not stick and the vent feels light and slightly warm to the touch, it is almost certainly plastic. Identifying the surface correctly helps you avoid accidental damage during cleaning.
Why Static Attracts Black Dust
Section titled “Why Static Attracts Black Dust”Plastic vent covers tend to collect stubborn black dust that looks different from ordinary household dust. Fast-moving air across dry plastic creates static electricity through friction. That static charge turns the vent surface into a dust magnet.
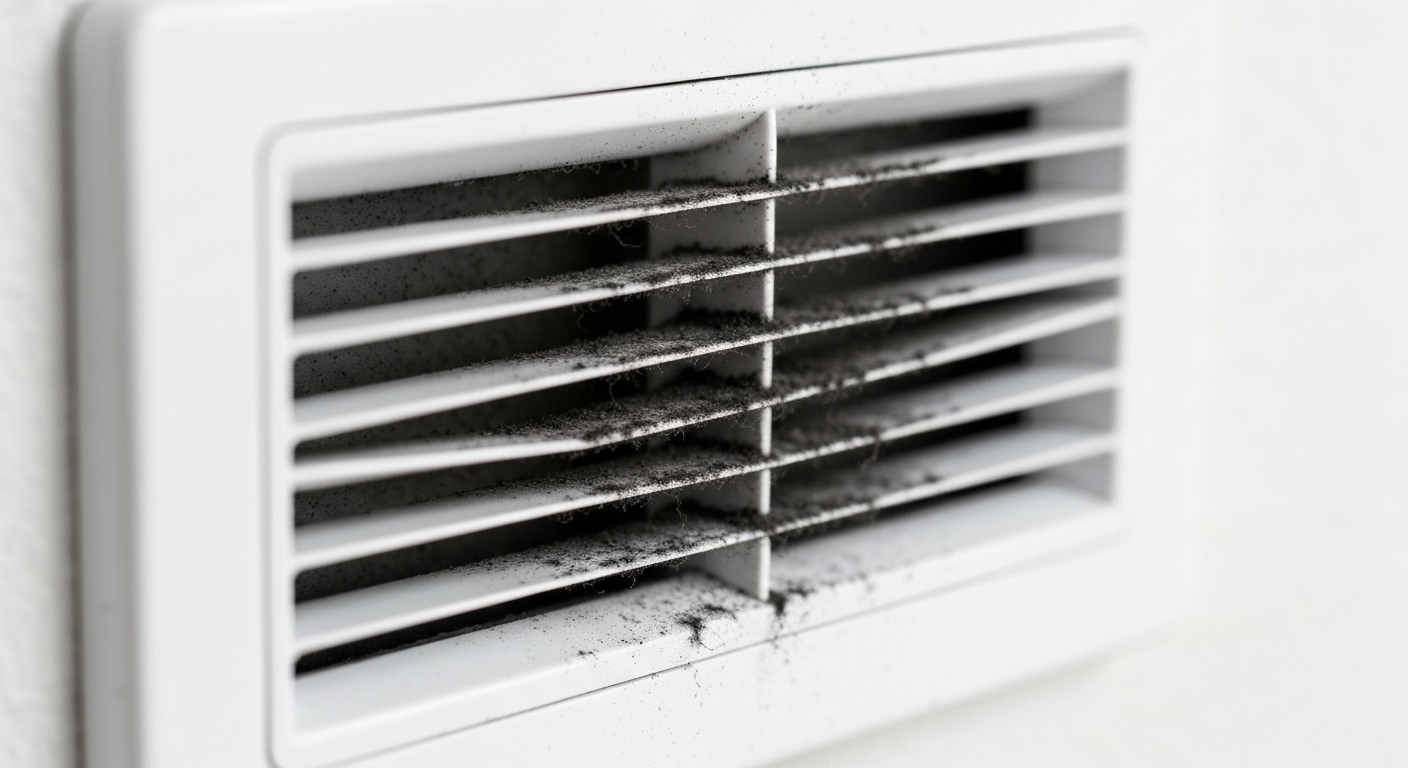
Airborne particles like pollen, pet dander, and fine soot are pulled toward the charged surface and cling tightly to the slats. Over time, this creates a dense, fuzzy layer that does not respond to light dusting.
Because this dust is electrostatically bonded, you need moisture or friction to remove it. Breaking the static charge is the secret to easier cleaning and longer-lasting results.
The Dishwasher Clean (Is It Safe?)
Section titled “The Dishwasher Clean (Is It Safe?)”Many homeowners wonder if plastic vents can go straight into the dishwasher. For solid white ABS or polystyrene vents, this can work well if done carefully, using the same gentle approach recommended for restoring yellowed white plastic fixtures. Warm water and dishwasher detergent reach into tight louvers that are tedious to clean by hand.
Heat is the main risk. Skip heated dry and sanitize cycles, since high temperatures can warp thin plastic slats. Let the vents air dry instead to protect their shape.
Never put painted or metallic-look plastic vents in the dishwasher. Detergents can strip coatings quickly, leaving uneven white plastic underneath.
Removing Kitchen Grease from Vents
Section titled “Removing Kitchen Grease from Vents”Kitchen vents deal with airborne cooking oils that settle as a sticky yellow film. This grease acts like glue for dust, creating buildup that smears when wiped dry. A vacuum alone cannot remove it.
For greasy vents, remove them and soak them in hot water with a strong kitchen degreaser or a TSP substitute. Let them soak for about 15 minutes so the oil softens.
Once the grease bond is broken, a soft brush easily lifts the grime away. Rinse well and dry completely before reinstalling.
Why Yellowing Happens on Ceiling Vents
Section titled “Why Yellowing Happens on Ceiling Vents”When white ceiling vents turn yellow or brown, the change is chemical rather than dirty. UV light from windows and fixtures breaks down components in the plastic over time. Warm air rising from heating systems speeds up this reaction.
In ABS plastic, bromine-based flame retardants migrate to the surface when exposed to heat and UV light. These molecules oxidize and create permanent discoloration.
Because the color change happens inside the plastic itself, scrubbing or bleaching will not remove it. The plastic has aged, not stained.
Painting Vents to Match the Wall
Section titled “Painting Vents to Match the Wall”Painting is a practical option when yellowing is deep and permanent. Good prep is essential because paint will not adhere to dusty or greasy plastic. Start with thorough cleaning and degreasing.
Lightly sand the surface with fine-grit sandpaper to give the paint something to grip. Use a spray paint designed to bond to plastic and apply several light coats.
Avoid heavy coats that can drip or glue moving louvers in place. Painted vents blend into the wall and gain a layer of UV protection that slows future yellowing.
Fixing Snapped Slats
Section titled “Fixing Snapped Slats”Plastic vent slats can snap from foot traffic or rough adjustment. For wall or ceiling vents, a gel-style super glue can sometimes repair a clean break. The gel stays in place and is easier to control.
Hold the pieces firmly until set and allow full curing time. Even then, the repair is never as strong as the original plastic.
For floor vents, replacement is safer than repair. A re-broken slat can leave sharp edges that are dangerous for bare feet.
The Dryer Sheet Anti-Static Wipe
Section titled “The Dryer Sheet Anti-Static Wipe”A simple laundry-room trick can reduce static dust buildup. Dryer sheets contain positively charged compounds that neutralize static on surfaces.
After cleaning and drying the vent, wipe all slats with a fresh dryer sheet. This leaves a thin anti-static layer behind.
With the static charge reduced, dust is less likely to cling. Many homeowners notice vents stay cleaner for weeks longer.
Identifying Mold Inside the Vent Plastic
Section titled “Identifying Mold Inside the Vent Plastic”Dark spots on vents can be dust or mold, and the difference matters. Dry, fuzzy material that wipes off easily is usually dust mixed with soot. Slimy or smeary spots that cling tightly are more suspicious.
Mold often grows on the back of vents or inside slats where condensation forms. Bathrooms and oversized air conditioners are common contributors.
If mold is suspected, remove the vent and soak it for 10 minutes in a solution of one part bleach to ten parts water. Killing spores before scrubbing prevents them from spreading into the air.
The Vacuum Brush Maintenance
Section titled “The Vacuum Brush Maintenance”The easiest cleaning is the one you never have to do deeply. Monthly maintenance keeps buildup from hardening. This fits neatly into a regular vacuum routine.
Use a soft brush attachment and gently vacuum vents on floors, walls, and ceilings. The brushing breaks static bonds while suction captures loosened dust.
This small habit prevents grease and humidity from turning dust into stubborn buildup. It saves time and keeps air moving freely.
Why Heat Makes Vents Brittle
Section titled “Why Heat Makes Vents Brittle”Plastic vents experience constant heating and cooling cycles. Over time, heat drives out plasticizers that keep the material flexible. The plastic slowly becomes brittle.
Older vents may crack at screw holes or snap at the corners during removal. Even gentle pressure can cause damage.
When handling aged vents, support them carefully and avoid overtightening screws. A light touch helps prevent sudden breakage.
Restoring the White Look (Peroxide)
Section titled “Restoring the White Look (Peroxide)”Yellowed vents can sometimes be lightened using a process known as retrobrighting. This method uses high-strength hydrogen peroxide and sunlight to reverse oxidation. A common product is 40-volume hair developer cream.
Coat the vent, wrap it in clear plastic to prevent drying, and place it in strong sunlight for a full day, a technique commonly used when cleaning and restoring plastic fan blades. UV light activates the peroxide and lightens the plastic.
Results can be dramatic, but often temporary. Yellowing may return within a year or two, though the process can be repeated if desired.
Cleaner Air and Whiter Vents
Section titled “Cleaner Air and Whiter Vents”Vent covers influence both air quality and how clean a room feels. Grease, static dust, and plastic aging each need a different approach. Simple habits make the biggest difference.
Regular vacuuming, occasional degreasing, and anti-static wiping keep buildup under control. Painting or peroxide treatments restore appearance when cleaning alone is not enough.
Clean vents improve airflow and brighten a space with very little effort. It is a small task with noticeable results.
References
Section titled “References”Industry guidance on maintaining plastic fixtures and air distribution components spans multiple trusted sources, including HVAC Maintenance Guidelines on air distribution system cleaning for airflow efficiency and hygiene, Krylon’s manufacturer advice on painting plastic registers with proper surface preparation and coatings, the RetroBright Community’s documentation on restoring yellowed ABS by reversing plastic photodegradation, Consumer Reports’ recommendations for improving indoor air quality and reducing dust and allergens, and the National Air Duct Cleaners Association’s professional standards for diffuser cleaning—collectively supporting best practices such as cleaning plastic light diffusers and ceiling panels to maintain performance, appearance, and indoor air quality.