Best Plastic Scratch Removers - Novus, Polywatch & Polish Guide
📑 Table of Contents
If you want one “best” plastic scratch remover, pick based on plastic chemistry and scratch depth. For large acrylic surfaces, Novus is the most controllable system. For polycarbonate headlights, Meguiar’s PlastX is usually the best balance of cut speed and finish, but you must add UV protection afterward.
For small, high-value acrylic optics like watch crystals, Polywatch is the safest and most predictable. For glossy automotive interior trim, Quixx can finish well, but it is not a miracle repair for deep gouges. DIY abrasives (toothpaste, baking soda) are cost-effective for low-stakes items, yet they have a high risk of dulling optical plastics.
The Best Plastic Scratch Remover for Each Use Case
Section titled “The Best Plastic Scratch Remover for Each Use Case”- Best for large acrylic sheets, pinball playfields, displays: Novus 1, 2, 3 system (start with the least aggressive step that works).
- Best for acrylic watch crystals and tiny optical windows: Polywatch.
- Best for polycarbonate headlights and exterior trim restoration: Meguiar’s PlastX, then a dedicated UV protectant or coating.
- Best for glossy “piano black” automotive interior plastics: Quixx (light defects), follow with a finer plastic polish if haze appears.
- Best ultra-low-cost option for non-optical plastics: Toothpaste (only non-gel), or baking soda slurry for very mild cleaning.
The Polishing Physics: Mechanical Polish vs. Chemical Filler
Section titled “The Polishing Physics: Mechanical Polish vs. Chemical Filler”There are only two real mechanisms that make scratches look “gone.” The first is abrasive polishing, which removes material around the scratch until the surface is level with the scratch bottom. The second is filling, where a resin, wax, or oil temporarily changes how light refracts in the scratch valley.
Most reputable plastic scratch removers (Novus, PlastX, Polywatch) are abrasive systems. Think of them as controlled liquid sandpaper, typically using aluminum oxide or siliceous minerals with a chosen particle size distribution. Results depend on matching abrasive aggressiveness to polymer hardness, plus managing heat and surface stress so you do not trigger haze or microcracking.
Plastic Scratch Remover Comparison Table
Section titled “Plastic Scratch Remover Comparison Table”| Product | Best plastic types | Abrasiveness (relative) | Typical use cases | Approx. price range (USD) | Main risks and limits |
|---|---|---|---|---|---|
| Novus 1/2/3 | Acrylic (PMMA), some uncoated plastics | 1: none, 2: mild, 3: high | Acrylic sheets, displays, pinball, hobby plastics | $8 to $25 (kits vary) | Novus 3 can leave persistent haze if overused, risk on coated polycarbonate, time-intensive on large areas |
| Polywatch | Acrylic watch crystals (hesalite, PMMA) | Mild (very fine) | Watch crystals, tiny optical ports | $8 to $15 per small tube | Too slow and expensive for big areas, limited on deep scratches |
| Meguiar’s PlastX | Polycarbonate (PC) headlights, exterior plastics | Medium to high (diminishing) | Headlight clarity, oxidation, moderate scratches | $10 to $18 | Can be too aggressive for delicate optics, requires UV protection after headlight polishing |
| Quixx | Automotive plastics, clear coats, glossy trim | Medium | Piano black trim, light scuffs | $12 to $25 (often as kit) | Not a deep scratch solution on plastic, can haze soft plastics if overworked |
| DIY (toothpaste, baking soda) | Utility plastics, low-stakes items | Toothpaste: medium, baking soda: low | Dull sinks, utility lenses, cleaning | $1 to $5 | Particle size is uncontrolled, can leave uniform scratching and permanent haze on optical plastic |
Which Plastic Scratch Remover Should You Choose?
Section titled “Which Plastic Scratch Remover Should You Choose?”Start with the least aggressive option that can actually change the scratch. If the scratch catches a fingernail, abrasives alone usually take too long or leave distortion, wet sanding becomes the correct first step. If the item is coated (anti-glare, hard coat, anti-fog), assume the coating will polish differently than the base polymer and test in an inconspicuous area.
Decision flow
Section titled “Decision flow”If the scratch does not catch your fingernail, start with a fine polish (Novus 2 for acrylic, PlastX for polycarbonate headlights, Polywatch for acrylic watch crystals). If the scratch barely catches, you may need a heavier compound (Novus 3) or a short sanding step at high grit (2000 to 3000) before polishing.
If the scratch clearly catches your fingernail, plan on wet sanding (often starting 800 to 1500 rather than 400 unless it is a true gouge). If the item is a high-value optical part (watch crystal, instrument window), avoid aggressive compounds and use controlled, incremental polishing, because a small amount of over-cut can permanently change curvature and optical distortion.
If the plastic is polycarbonate with a hard coat (common on some lenses and protective windows), avoid solvent-heavy products and avoid guessing. If you are unsure whether it is coated, treat it as coated and use minimal abrasion, because once a hard coat is unevenly cut, the haze can be irreparable without stripping and re-coating.
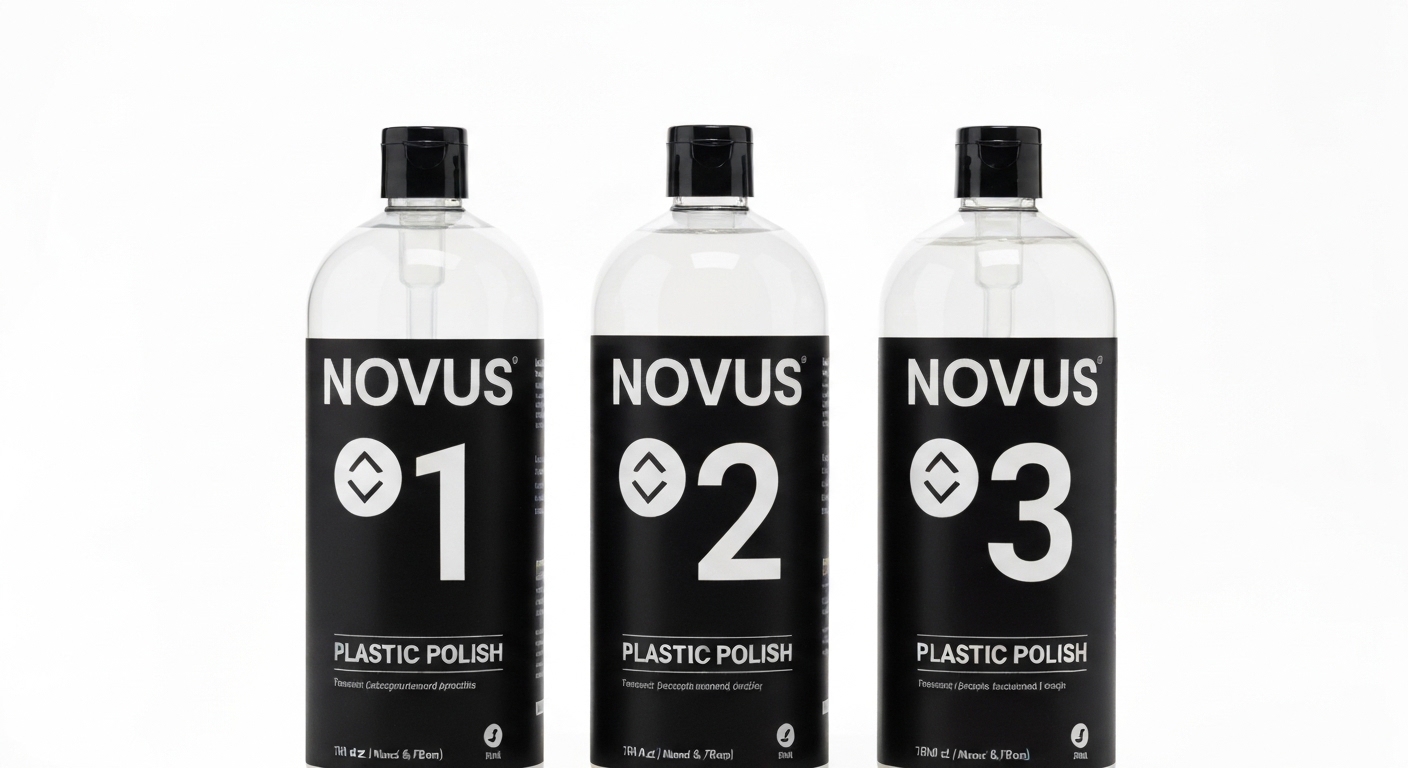
Novus 1, 2, 3 (The System)
Section titled “Novus 1, 2, 3 (The System)”Novus remains the most predictable system for acrylic (PMMA) because it is explicit about stepwise aggressiveness. The system is not “one polish,” it is a controlled reduction in scratch depth from coarse to fine, followed by cleaning and antistatic finishing. Used correctly, it restores true clarity because you are leveling the surface rather than masking defects.
Novus 3 (Heavy) is for deep defects where you accept an intermediate haze. It uses a coarser abrasive, so it can quickly flatten gouge edges, but it also creates its own uniform micro-scratching that must be removed by Novus 2. Do not use Novus 3 on thin optical parts where geometry matters (watch crystals, curved instrument lenses), or on coated polycarbonate where the coating may cut unpredictably.
When NOT to use Novus 3: if the defect is only light haze or fine swirls, Novus 3 is unnecessary over-cut that increases time and risk. If you can get improvement with Novus 2 in a few minutes, stay with Novus 2. If the scratch is deep enough to catch a fingernail, Novus 3 alone often becomes inefficient compared to sanding because you need bulk leveling, not just refining.
Expected results by defect severity: Novus 2 can remove light scuffs and restore gloss on acrylic in minutes, assuming the damage is shallow. Novus 3 can reduce the visibility of deeper scratches, but you should expect a dull, frosted look until you complete a full Novus 2 refinement pass. For large acrylic panels, plan for time, because polishing is area-based, not scratch-based, and uneven work shows as optical distortion.
Novus 1 (Clean) is non-abrasive and typically contains silicone and antistatic agents that can reduce the appearance of micro-swirls and lower dust attraction. It is not a substitute for leveling, it is a finishing and maintenance step.
Polywatch (For Acrylic Crystals)
Section titled “Polywatch (For Acrylic Crystals)”Polywatch is optimized for small acrylic optics where you need controlled, fine abrasion with minimal risk of over-cut. On acrylic, the polish can slightly soften the near-surface region during rubbing due to frictional heating and plasticization effects, then re-level it through abrasion, which is why it performs well on hairline defects.
It is not cost-effective for headlights or large windows because the tube volume is small and the cut rate is deliberately conservative. For deep acrylic watch scratches, a stepped approach (very fine wet sanding at high grit, then Polywatch) can work, but it requires discipline to preserve curvature.
Meguiar’s PlastX (Headlight Power)
Section titled “Meguiar’s PlastX (Headlight Power)”PlastX is popular for headlights because it cuts oxidation and moderate scratching quickly on polycarbonate, placing it among the best plastic scratch removers for that material. It uses diminishing abrasives, which start more aggressive and fracture into finer particles during rubbing, producing a smoother finish if you work it long enough. Many formulas also include oils that improve wipe-off and temporarily enhance clarity, but they do not replace UV protection.
Headlight mini-process (practical, low-risk)
Section titled “Headlight mini-process (practical, low-risk)”Wash, then clay or decontaminate the lens if it feels gritty, because embedded particles cause new scratches. Tape paint and trim, then apply PlastX with a foam applicator or microfiber, working small sections until the residue turns clearer and feels slicker. Wipe, inspect under strong light, and repeat only where defects remain, because overworking can create haze or localized distortion.
After polishing, apply a UV protectant or a purpose-made headlight coating, because the factory UV layer is often already degraded and polishing removes more of what remains. Without UV follow-up, the lens can re-yellow quickly because photo-oxidation continues in the now more exposed polymer surface.
Quixx (Car Paint Science)
Section titled “Quixx (Car Paint Science)”Quixx is marketed around “plastic deformation” concepts in paint, but on plastics it behaves mainly as a competent abrasive polishing kit. It can be useful on glossy interior trim where you want improved clarity and reduced scuff visibility without jumping immediately to sandpaper.
It is not a substitute for true leveling when scratches are deep. If a piano-black part is soft, aggressive rubbing can create uniform haze, and the fix becomes a finer finishing polish and a gentler pad rather than more pressure.
Toothpaste and Baking Soda (DIY Options)
Section titled “Toothpaste and Baking Soda (DIY Options)”Toothpaste works only because many pastes contain silica abrasives with meaningful hardness and particle size. Whitening toothpaste is often much more abrasive than people assume, frequently in the range that can leave visible micro-scratching on optical acrylic and polycarbonate. Gel toothpaste is usually too low-abrasion to do anything besides cleaning.
Baking soda (sodium bicarbonate) is a much gentler abrasive and is better framed as a mild scuff cleaner than a scratch remover. A workable slurry is about 2 parts soda to 1 part water, but you should not expect it to remove a scratch that is optically obvious. For anything you want truly clear, controlled commercial abrasives are more predictable because particle size and binder rheology are engineered.
Common Mistakes That Permanently Damage Plastic
Section titled “Common Mistakes That Permanently Damage Plastic”Avoiding irreversible damage is mostly about controlling heat, stress, and uncontrolled abrasives. Optical plastics fail by haze, surface distortion, or stress cracking, and many “hacks” push directly into those failure modes.
Do not dry sand plastic, frictional heating can soften the polymer and cause rippling that looks like permanent waviness. Do not use ammonia-containing metal polishes (for example, Brasso) on acrylic or polycarbonate, because ammonia can trigger stress crazing in susceptible polymers, especially where residual molding stress exists. Do not assume a coated lens will polish like bare plastic, hard coats can turn cloudy or patchy when partially abraded.
Sanding Progression (400 to 3000)
Section titled “Sanding Progression (400 to 3000)”If you can feel the scratch with your fingernail, sanding is usually the only efficient way to truly level it. Sanding is controlled bulk material removal, polishing is refinement, and swapping those roles wastes time and increases optical distortion. Always wet sand, water reduces heat and clears abraded debris that otherwise re-scratches the surface.
Checklist before you start
Section titled “Checklist before you start”Clean thoroughly, then mark the scratch zone so you do not over-sand the whole part. Use a sanding block on flat surfaces to prevent finger grooves, and keep pressure low and consistent. Expect the surface to look worse before it looks better, because sanding intentionally converts deep scratches into uniform, shallow scratch patterns.
Time expectations (realistic)
Section titled “Time expectations (realistic)”On a hand-sized area, each grit step may take 2 to 8 minutes depending on plastic hardness and scratch depth. The slow part is not the first grit, it is fully removing the previous grit’s scratch pattern before you move on. If you advance too early, you will polish forever and never fully regain clarity.
Sanding progression (numbered protocol)
Section titled “Sanding progression (numbered protocol)”- Wet sand 400 grit only for true gouges or heavy damage, stop as soon as the scratch is uniformly leveled.
- Wet sand 800 grit until all 400-grit lines are gone.
- Wet sand 1500 grit until the surface shifts from opaque white toward a more even translucency.
- Wet sand 2000 grit to reduce visible scratch contrast.
- Wet sand 3000 grit to reach a near-clear haze.
- Polish with a fine plastic polish (often Novus 2) to restore gloss and clarity.
Typical Prices and Value Analysis
Section titled “Typical Prices and Value Analysis”Novus kits typically land around $15 to $25 depending on bottle sizes, and they are cost-effective because each bottle covers many square feet of acrylic when used correctly, a point often highlighted in any solid plastic polish comparison. Polywatch is commonly $8 to $15 for a small tube, which is a reasonable value for watch crystals but expensive per square inch for larger parts. PlastX is usually $10 to $18 for a bottle that lasts multiple headlight jobs, so cost-per-use is low if you also budget for a UV protectant.
Quixx kits often run $12 to $25 and can be good value if you need the included consumables, but the value drops if you end up needing separate finer finishing products. DIY options are cheapest up front, yet they are “high variance,” a single hazing mistake on a valuable clear part costs more than any dedicated polish.
Why “Clear Coat” Sprays Fail on Headlights
Section titled “Why “Clear Coat” Sprays Fail on Headlights”Many hardware-store clear sprays rely on strong solvents that can attack polycarbonate and accelerate crazing, especially on stressed or UV-aged lenses. Even if the lens looks good initially, poor adhesion and insufficient UV stability often lead to peeling or rapid yellowing.
A more durable approach is a catalyzed 2K urethane clear designed for automotive exposure, applied according to its pot life and cure schedule; understanding the underlying plastic scratch removal science as it applies to polycarbonate can help ensure compatibility, as the key is that the coating chemistry and UV package must match outdoor photodegradation demands, and the surface prep must be compatible with polycarbonate (plastic scratch removal science).
Summary: What is best for your situation?
Section titled “Summary: What is best for your situation?”For acrylic sheets and display plastics, Novus is usually the best all-around system because it gives you controlled cut levels from restoration through maintenance. For headlights, PlastX is the practical winner for speed and availability, but it is only half the job unless you follow with UV protection. For acrylic watch crystals, Polywatch is the safest choice because it is tuned for tiny optical surfaces.
For deep scratches you can feel, sanding from 400 to 3000 grit, then polishing, is the correct pathway regardless of brand. Avoid ammonia-containing metal polishes and solvent-heavy hacks on stressed plastics, because crazing and haze are often permanent.
References
Section titled “References”- Novus Polish. Technical data on abrasive particle size and product intended use.
- Meguiar’s. PlastX safety and formulation notes, including diminishing abrasive behavior.
- Make Magazine. Acetone vapor polishing methodology and risk controls.
- ANSI Z87.1. Polycarbonate performance considerations and chemical exposure cautions.