Removing Sticker Residue from Plastic - The Safe Guide
📑 Table of Contents
If your sticker is on a painted wall or drywall, use the wall specific guide instead at /flooring/removing-sticker-residue-from-walls. If the residue is on a gaming console or electronics housing, follow the console focused guide at /homeoffice/removing-sticker-residue-gaming-console. This page is the master reference for plastic substrates and solvent compatibility.
How to remove sticker residue from plastic (safest method)
Section titled “How to remove sticker residue from plastic (safest method)”- Warm the sticker with a hair dryer for 30 to 60 seconds, then peel back at a 180 degree angle.
- If residue remains, apply vegetable or mineral oil and wait 1 to 2 hours.
- Wipe off the softened adhesive and wash with dish soap.
- If needed, dab 91 percent isopropyl alcohol for 20 to 30 seconds, avoid acrylic and polycarbonate.
- For cured residue, use a plastic razor or adhesive eraser wheel with light pressure.
Avoid using harsh solvents on plastic surfaces: acetone, MEK, xylene, and toluene can cause damage; citrus or limonene products should not be used on polystyrene; and long alcohol soaks can stress or crack polycarbonate or acrylic—especially important to keep in mind when removing sticker residue from gaming consoles, where these plastics are common.
Quick Decision Tree: Pick the Safest Method by Plastic Type
Section titled “Quick Decision Tree: Pick the Safest Method by Plastic Type”Start by identifying the plastic. Look for a recycling code, note whether it is clear or opaque, and gently flex an inconspicuous edge. When in doubt, assume the plastic is stress sensitive and choose the lowest risk path.
If the plastic is opaque and flexible, typical of PP or PE storage bins, begin with heat and oil. If it is opaque and rigid, often ABS or HIPS, oil followed by short alcohol contact is usually tolerated. If it is clear and rigid, such as PS, PMMA, or PC, avoid citrus solvents and limit alcohol contact to brief test spots only.
Always follow the same sequence. Identify the plastic, choose the mildest method, perform a test spot, control dwell time, then complete cleanup with detergent and water.
The Adhesive Guide: Surface Energy and Solubility
Section titled “The Adhesive Guide: Surface Energy and Solubility”Sticker adhesives are pressure sensitive adhesives based on rubber or acrylic polymers. The plastic beneath is also a polymer with its own solubility window. Removal works when the solvent swells or dissolves the adhesive chains without penetrating the plastic matrix.
This is governed by Hildebrand and Hansen solubility parameters. In plain terms, like dissolves like. When a solvent is too compatible with the plastic, it causes clouding, crazing, or permanent softening.
Rule of thumb for household plastics is straightforward. Polystyrene reacts poorly to limonene and aromatics. Polycarbonate and acrylic can craze under alcohol if stressed. Polypropylene and polyethylene resist solvents but scratch easily.
Mechanical Removal: Heat and Controlled Scraping
Section titled “Mechanical Removal: Heat and Controlled Scraping”Before chemistry, use physics. Adhesives are viscoelastic, meaning heat lowers their modulus and tack. A hair dryer on high for 45 seconds softens the adhesive enough to enable a clean peel.
Peel slowly back over itself at a 180 degree angle, a technique often recommended when cleaning plastic jars and removing labels as outlined in this guide on cleaning plastic jars and removing labels. This concentrates stress at the adhesive interface rather than lifting straight up. Avoid heat guns, which exceed the glass transition temperature of many plastics and cause warping.
For remaining residue, use plastic razor blades only. They are hard enough to lift adhesive yet soft enough to avoid gouging acrylic or polycarbonate surfaces.
Test Spot + Dwell Time Protocol (Prevents Clouding and Crazing)
Section titled “Test Spot + Dwell Time Protocol (Prevents Clouding and Crazing)”Every chemical method should begin with a test. Choose an inconspicuous area and apply the solvent with a cotton swab rather than flooding the surface. Start timing immediately.
Allow contact for the minimum effective dwell time, then rinse with water and dry. Inspect under angled light for haze, whitening, or fine cracks. If any change appears, stop and revert to oil or mechanical methods.
This protocol is especially critical for clear plastics and snap fit parts where residual molding stress is present.
Adhesive Remover Compatibility and Risk Comparison
Section titled “Adhesive Remover Compatibility and Risk Comparison”| Remover Method | Typical Dwell Time | PP / PE | ABS | PS / HIPS | PC | PMMA (Acrylic) | Notes |
|---|---|---|---|---|---|---|---|
| Vegetable or Mineral Oil | 1 to 2 hours | Low risk | Low risk | Low risk | Low risk | Low risk | Requires detergent wash after removal |
| Dish Soap Soak | 30 to 60 min | Low risk | Low risk | Low risk | Low risk | Low risk | Best for paper labels |
| Isopropyl Alcohol 70% | 20 to 40 sec | Low risk | Low risk | Moderate | Moderate to high | Moderate | Short contact only on clear plastics |
| Isopropyl Alcohol 91% | 20 to 30 sec | Low risk | Moderate | High | High | High | Test spot mandatory |
| Citrus or Limonene | 1 to 5 min | Low risk | Moderate | Severe | Moderate | Moderate | Avoid on PS entirely |
| Mineral Spirits or WD-40 | 2 to 5 min | Low risk | Moderate | High | High | Moderate | WD-40 is petroleum distillates plus additives, wash thoroughly |
| Naphtha | 30 to 60 sec | Moderate | Moderate | Severe | High | High | High volatility and odor |
| Adhesive Eraser Wheel | Seconds | Low risk | Low risk | Moderate | Moderate | Moderate | Control heat buildup |
The Oil Soak Method: Chemistry of Lipids
Section titled “The Oil Soak Method: Chemistry of Lipids”Most paper labels are porous and most rubber based adhesives are lipophilic. Vegetable oil migrates through the paper fibers and swells the adhesive, reducing adhesion without interacting with the plastic.
When oil seems ineffective, the adhesive is often acrylic based or heavily cross linked, especially when trying to remove sticker residue from plastic safely. In those cases, longer dwell time or a transition to brief alcohol contact is required. To prevent drips, build a paper towel dam around the sticker or cover with plastic wrap.
After removal, degrease thoroughly with dish soap, especially for food containers. Residual oil can attract dirt or interfere with future labels.
Peanut butter functions as a paste form of this method. The oil acts as the solvent and the solids provide mild abrasion, which helps on vertical surfaces.
The Alcohol Method: Polar Solvents and Stress Sensitivity
Section titled “The Alcohol Method: Polar Solvents and Stress Sensitivity”Isopropyl alcohol disrupts hydrogen bonding and dehydrates many acrylic pressure sensitive adhesives. Higher concentration works faster but increases plastic risk.
Use 70 percent alcohol when possible and reserve 91 percent for stubborn spots. Limit dwell time to under 30 seconds on acrylic or polycarbonate and avoid stressed parts such as snap fit lids, thin clear bins, or molded corners.
Never soak clear plastics in alcohol. Crazing often appears minutes to hours later as fine cracks radiating from stressed regions.
Why Citrus Products Damage Polystyrene
Section titled “Why Citrus Products Damage Polystyrene”Citrus cleaners rely on d limonene, a terpene solvent with strong affinity for styrenic polymers. Polystyrene and high impact polystyrene absorb limonene, leading to whitening, surface etching, and loss of mechanical strength.
Other solvent families that pose similar risks include aromatics such as toluene and xylene, and ketones such as acetone or MEK. For polystyrene, safer alternatives are oil, soap, or mechanical removal.
Real World Mini Case Studies
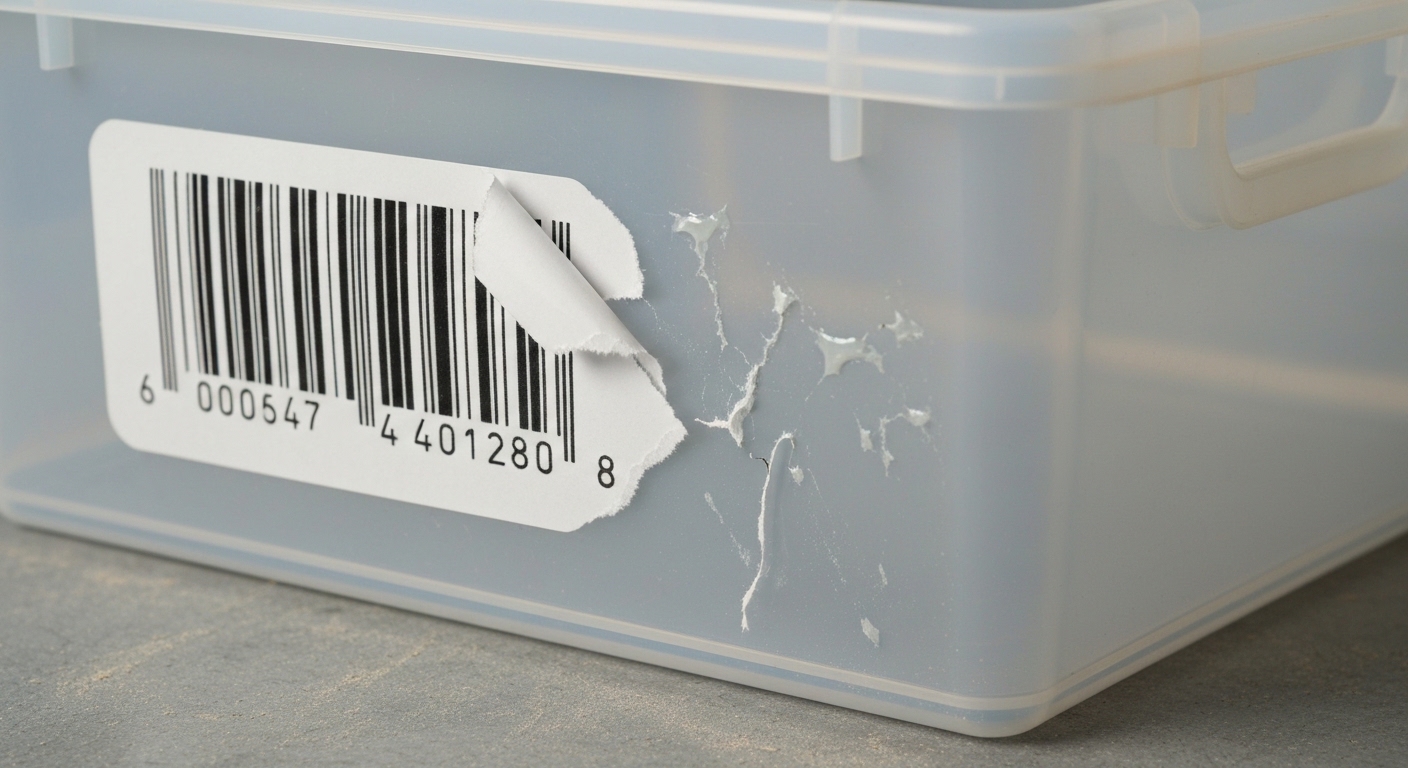
Section titled “Real World Mini Case Studies”A polypropylene storage bin with a shipping label responded to heat and a two hour oil soak. The adhesive wiped away cleanly and detergent restored the surface without gloss change.
A clear polystyrene CD case clouded instantly when exposed to citrus cleaner. Switching to oil and a plastic razor removed remaining residue without further damage.
An acrylic desk organizer developed light haze after prolonged alcohol rubbing. The area recovered visually after washing and polishing with a plastic polish applied to the entire surface.
Matte and Textured Finishes
Section titled “Matte and Textured Finishes”Textured plastics trap adhesive in surface valleys. Apply the chosen solvent sparingly, agitate with a soft toothbrush, then blot rather than wipe to lift residue out of the texture.
Avoid aggressive scrubbing on rubberized or soft touch coatings. These finishes can whiten or delaminate under solvent exposure.
Aged and Cured Adhesive Residue
Section titled “Aged and Cured Adhesive Residue”Old residue hardens due to oxidation and UV driven cross linking. Solvents have limited effect because the adhesive is no longer soluble.
Mechanical removal becomes primary. Adhesive eraser wheels operated at low speed can remove residue through controlled friction, provided heat buildup is monitored.
Restoring Surface Appearance After Removal
Section titled “Restoring Surface Appearance After Removal”A glossy or dull square may remain after sticker removal. This can result from differential UV exposure or micro abrasion.
Polishing the entire surface with a mild plastic polish or automotive wax helps unify gloss. UV fading differences cannot be fully reversed.
FAQ: Sticker Residue on Plastic
Section titled “FAQ: Sticker Residue on Plastic”Is Goo Gone safe on plastic? It depends on the polymer. It can damage polystyrene and stress sensitive plastics, so test carefully or avoid on clear rigid items.
Can I use acetone or nail polish remover? No. These solvents dissolve or craze most common plastics.
Does a magic eraser work? It can remove residue mechanically but often leaves fine scratches, especially on glossy plastics.
What about textured plastics? Use minimal solvent, a soft brush, and blotting to avoid spreading residue.
Is dishwasher cleanup safe after removal? Only for dishwasher rated items and after all solvents are washed away.
Is the surface food safe afterward? Yes after thorough washing with dish soap and water to remove solvent residues.
References
Section titled “References”3M Technical Bulletin. Adhesive Residue Removal Guide.
Eastman Chemical. Chemical Resistance of Common Thermoplastics.
Consumer Reports. Sticker Removers Tested.