Fix Cloudy Keurig Water Reservoir - Cleaning and Restoration Guide
📑 Table of Contents
The Cloudy Reservoir Problem
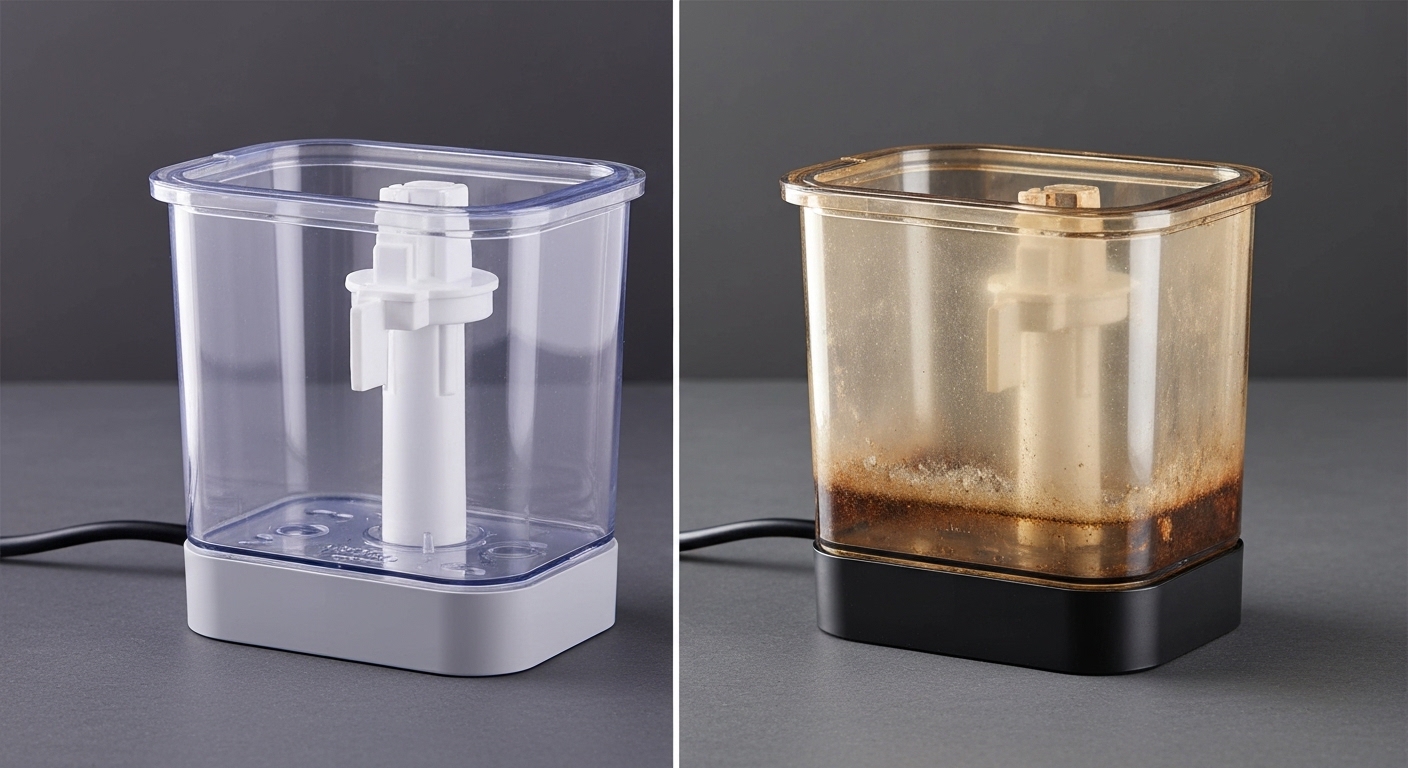
Section titled “The Cloudy Reservoir Problem”A Keurig reservoir that turns hazy or milky is usually not a sudden failure. It is a slow accumulation of mineral scale, surface wear, or biological residue that finally reaches a visible threshold. I see this constantly in shop work on small appliances that use standing water.
Cloudiness matters for two reasons. First, it tells you something is happening to the plastic surface. Second, it often tracks with taste issues or hygiene problems that affect the brew, not just appearance.
The key is separating what can be chemically removed from what is permanent plastic damage. Once you understand that difference, the fix or replacement decision becomes straightforward.
Why Keurig Tanks Get Cloudy
Section titled “Why Keurig Tanks Get Cloudy”Reservoir clouding usually comes from three overlapping mechanisms, a pattern you’ll also see discussed in guides on removing mineral scale from small appliance water reservoirs. Each one behaves differently under cleaning, and each leaves different visual clues.
Mineral scale is the most common cause. Calcium and magnesium carbonates settle out of hard water as it sits in the tank, especially along the water line, and heating cycles accelerate this process.
Surface micro-scratching is next. Every abrasive sponge, paper towel, or aggressive wipe cuts microscopic grooves into the plastic, which scatter light and create a frosted look.
Biofilm is the third contributor. Bacteria form a transparent matrix on constantly wet plastic, trapping minerals and debris and sometimes etching the surface underneath.
Reservoir Plastic Types
Section titled “Reservoir Plastic Types”Keurig has used several plastics over the years, and the material determines both cleaning tolerance and long-term durability. You can usually identify it by the recycling symbol molded into the tank.
Older reservoirs were commonly polycarbonate. It is optically clear and heat resistant but moderately sensitive to acids and abrasive cleaning.
Most newer clear reservoirs use Tritan copolyester. It is BPA-free, more chemically stable, and more forgiving during descaling, though it still scratches easily.
ABS appears in structural or opaque components, not usually the clear tank body. It hides clouding visually but still accumulates scale and biofilm.
Mineral Scale vs Plastic Etching
Section titled “Mineral Scale vs Plastic Etching”Before cleaning, you need to diagnose the cloudiness correctly. Mineral scale sits on the surface and can be dissolved. Etching and scratching are inside the plastic and cannot be reversed.
Scale usually follows the water line and feels rough. Etching looks uniform, feels smooth, and does not change with wiping.
The fastest test is vinegar contact. Press a vinegar-soaked paper towel against the cloudy area for ten minutes. If it clears, you are dealing with scale.
If nothing changes, the plastic itself is damaged. No cleaner will fix that.
Vinegar Soak Method
Section titled “Vinegar Soak Method”White distilled vinegar works for most mineral buildup when used correctly. The acetic acid dissolves calcium carbonate without attacking the plastic if exposure time is controlled.
Remove the reservoir and fully submerge it. Use straight vinegar for heavy scale or a 1:1 mix for light buildup.
Soak for two hours minimum. Heavy deposits may need eight to twelve hours with a fresh solution halfway through.
After soaking, wipe gently with a soft cloth and rinse thoroughly. Run two plain water brew cycles before making coffee.
Citric Acid vs Vinegar
Section titled “Citric Acid vs Vinegar”Citric acid is my preferred descaler for severe buildup. It is stronger, faster, and leaves no lingering odor.
Two tablespoons of food-grade citric acid per quart of warm water outperforms straight vinegar. It is also gentler on older polycarbonate reservoirs during long soaks.
Over time, citric acid is cheaper and more effective for hard water households. Vinegar is fine for light maintenance.
Cleaning the Spring Valve
Section titled “Cleaning the Spring Valve”The spring valve at the reservoir base collects scale and biofilm faster than any other area. Ignoring it leads to flow issues and off-flavors.
Use a cotton swab soaked in descaler and work around the valve seat. Activate the valve manually to flush solution through it.
Rinse thoroughly and inspect the gasket. Hardened or cracked seals should be replaced.
Avoiding Abrasive Sponges
Section titled “Avoiding Abrasive Sponges”Abrasive cleaning permanently damages reservoirs. Green pads, scouring sponges, and paper towels all cut the plastic surface.
Once scratched, clarity cannot be restored internally. Chemical soaking replaces scrubbing, not the other way around.
Use microfiber or soft cotton only, and let chemistry do the work.
How Clouding Affects Coffee Taste
Section titled “How Clouding Affects Coffee Taste”Scale alters water chemistry. Dissolved minerals change extraction and often increase bitterness or chalky mouthfeel.
Biofilm produces metabolic byproducts that cause stale or musty flavors, even at low concentrations, which is why cleaning cloudy plastic water containers is important.
Visual contamination also affects perception. If the reservoir looks dirty, most people perceive the coffee as worse.
Biofilm Risk in Reservoirs
Section titled “Biofilm Risk in Reservoirs”Standing water, warm temperatures, and microscopic surface damage create ideal conditions for biofilm growth. Once established, it resists casual cleaning.
Chemical soaking loosens biofilm, but physical removal finishes the job. Gentle wiping after descaling is essential.
Valve areas, corners, and lids are the highest-risk zones.
Sanitizing the Reservoir Lid
Section titled “Sanitizing the Reservoir Lid”The lid traps condensation and is often overlooked. It should be cleaned separately.
Wash with dish soap regularly. Periodically soak in a dilute bleach solution, one teaspoon per quart, for ten minutes.
Rinse thoroughly and air dry completely before reinstalling.
Testing Your Water Hardness
Section titled “Testing Your Water Hardness”Hard water dramatically accelerates reservoir clouding. Testing tells you how aggressive your maintenance schedule needs to be.
Test strips or reagent kits are inexpensive and accurate enough for appliance care. Municipal water reports also list hardness data.
Well water users should always test directly due to wide variability.
Using Distilled or Filtered Water
Section titled “Using Distilled or Filtered Water”Distilled water eliminates scale entirely but costs more and may flatten coffee flavor. Reverse osmosis systems offer a better long-term balance.
Very soft water reduces maintenance but may require mineral adjustment for best taste. This is a flavor choice, not a safety issue.
Polishing the Exterior Only
Section titled “Polishing the Exterior Only”Exterior clouding and scratches can sometimes be improved with plastic polish. This does not affect interior damage.
Headlight-style polishing compounds work if scratches are shallow. Deep damage or textured finishes will not polish evenly.
Polishing removes material, so it should be occasional, not routine.
When Replacement Is the Right Call
Section titled “When Replacement Is the Right Call”Replacement is justified when cloudiness does not respond to descaling, when cracks or crazing appear, or when odors persist after sanitizing.
Older polycarbonate tanks without BPA-free labeling are also reasonable candidates for replacement based on personal risk tolerance.
Modern replacement reservoirs restore clarity, hygiene, and service life in one step.
Final Notes
Section titled “Final Notes”Cloudy Keurig reservoirs are usually a maintenance issue, not a defect. Correct diagnosis prevents wasted effort and further damage.
Use chemical descaling, avoid abrasion, control biofilm, and match maintenance to your water hardness—good coffee maker plastic care and descaling practices help extend the life of components. When the plastic itself fails, replace it and move on.