Removing Hairspray Buildup from Acrylic - PMMA Safe Cleaning Guide
📑 Table of Contents
The Cloudy Bathroom Acrylic Problem
Section titled “The Cloudy Bathroom Acrylic Problem”Acrylic shelving, mirror frames, and organizers often turn cloudy in bathrooms even when you clean regularly. The most common cause is hairspray overspray that deposits a near-invisible polymer film, then oxidizes and hardens over time.
This guide is narrowly focused on hairspray polymers on bathroom acrylic (PMMA) and the safest ways to remove that film without creating permanent haze or cracking. For general acrylic upkeep and restoration outside hairspray residue, see acrylic.
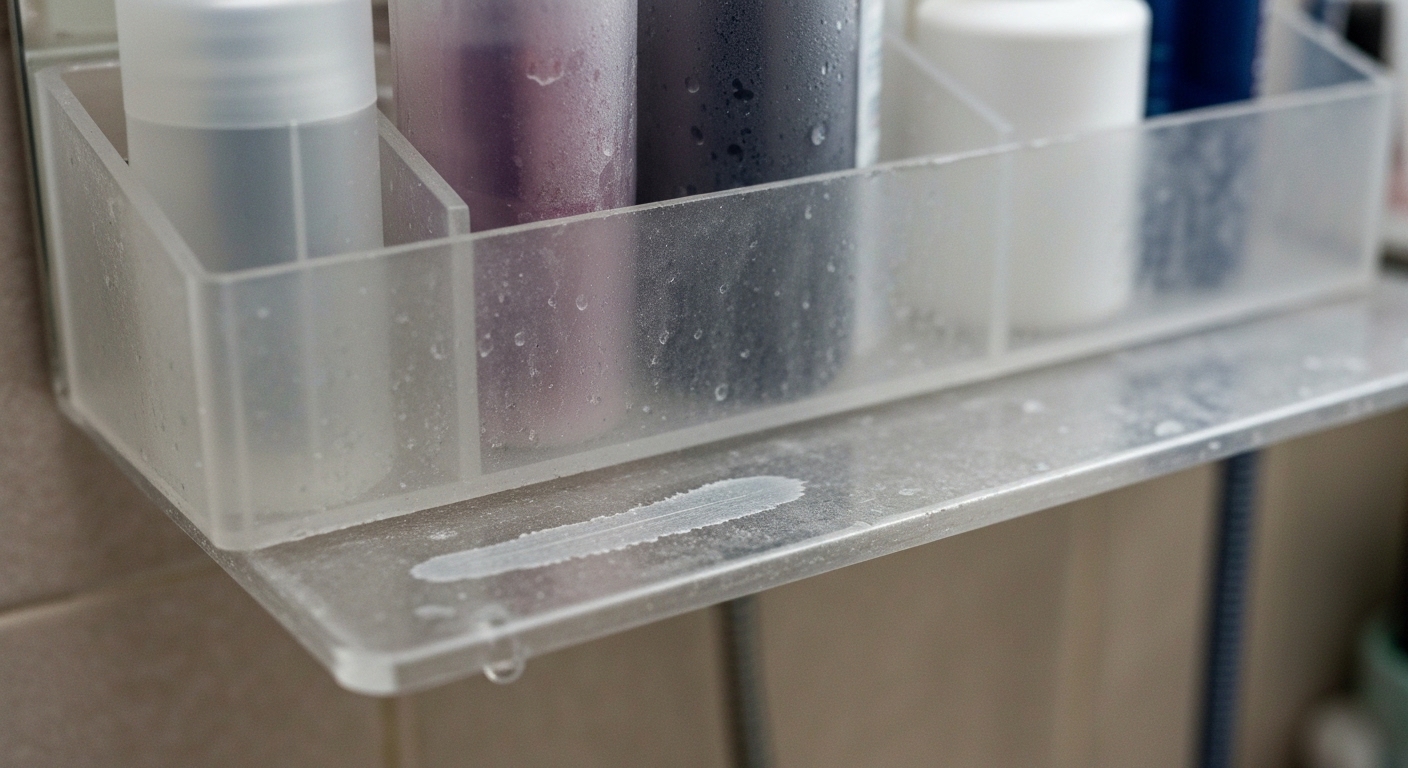
How to Remove Hairspray from Acrylic (PMMA-Safe)
Section titled “How to Remove Hairspray from Acrylic (PMMA-Safe)”- Rinse dust off with lukewarm water.
- Soak in warm water plus a few drops of dish soap for 15 to 30 minutes.
- Wipe gently with clean microfiber while the surface is wet.
- For fixed items, use a soapy compress for 30 to 60 minutes.
- If haze remains, use a tiny amount of mineral oil, then rewash with soap.
- Rinse well and dry by blotting, not scrubbing.
Acrylic (PMMA) Chemical Sensitivity in Bathrooms
Section titled “Acrylic (PMMA) Chemical Sensitivity in Bathrooms”Polymethyl methacrylate (PMMA), commonly called acrylic, has excellent optical clarity but limited tolerance to many household solvents. The ester-rich PMMA backbone can absorb certain organics, which leads to localized swelling and stress redistribution, then cracking (crazing) in stressed parts.
Bathroom acrylic is often under stress even if it looks rigid, because bending during assembly, press-fit clips, screwed mounts, and sharp corners concentrate stress. That is why the “works fine on one item” experience does not generalize well across acrylic accessories.
Acrylic also scratches more easily than glass. A cleaner that is chemically safe can still leave lasting haze if it contains abrasive particles, or if wiping media traps grit.
Why Hairspray Bonds to Acrylic
Section titled “Why Hairspray Bonds to Acrylic”Most hairsprays deposit a film made of styling polymers (commonly acrylate copolymers or vinyl acetate based copolymers) plus plasticizers and fragrance oils. The carrier solvents flash off quickly, leaving a continuous polymer layer.
On acrylic, the first deposition layer can anchor well because the overspray solvent plume briefly increases chain mobility at the PMMA surface, then the hairspray polymer coalesces into that microtexture. After weeks to months, oxidation and mild crosslinking can increase cohesion of the film, which is why older buildup wipes poorly even when it is thin.
The “cloudy” appearance is usually a combination of film thickness variation, embedded dust, and micro-scratches from prior cleaning attempts. True chemical etching is less common than people assume, but it can happen after repeated exposure to incompatible cleaners.
PMMA-Safe Cleaners Comparison Table
Section titled “PMMA-Safe Cleaners Comparison Table”Use this table to choose the lowest-risk method that can realistically remove your level of hairspray film.
| Cleaner or Method | Removes Hairspray Film | PMMA Safety Verdict | Risk Level | Notes for Bathroom Acrylic |
|---|---|---|---|---|
| Warm water + mild dish soap (Dawn type) | High (with time) | Yes | Low | Best first-line approach, relies on surfactants plus contact time. |
| Soapy compress (cloth + plastic wrap) | High | Yes | Low | Extends dwell time on installed shelves and frames. |
| Plastic cleaner/polish (PMMA-labeled) | Medium to high | Usually | Low to medium | Check for alcohols or “solvent cleaners” in ingredients. |
| Dilute white vinegar (1:4 vinegar:water) | Medium | Usually | Low | Helpful on light film, rinse if you have coated acrylic. |
| Mineral oil or baby oil (sparingly), then soap wash | Medium to high | Generally | Medium | Effective on aged film, must be fully degreased afterward. |
| Isopropyl alcohol, ethanol, alcohol wipes | High initially | No | High | Can trigger crazing, especially on thin or stressed PMMA. |
| Ammonia glass cleaners (Windex-type) | Medium | No | High | Stress cracking risk and cumulative haze, avoid on acrylic. |
| Acetone, MEK, lacquer thinner | Very high | No | Extreme | Direct PMMA attack, permanent damage likely. |
| Abrasive cleaners, melamine sponges, scouring pads | Variable | No | High | Micro-scratching creates permanent diffuse haze. |
Visual Callouts: Identify Film vs Damage Before You Clean
Section titled “Visual Callouts: Identify Film vs Damage Before You Clean”Film clues: haze changes when wet, fingerprints smear, and the cloudiness is patchy or directional with overspray. Damage clues: haze does not change when wet, shows a fine crack network, or appears as a uniform “frosted” zone near holes, bends, or clips.
If you see a crack network, review crazing before you continue. Cleaning will not remove crazing, and some cleaners will rapidly worsen it.
The Dawn Soak Method (Expanded)
Section titled “The Dawn Soak Method (Expanded)”Dish soap works because surfactants lift oils and polymer residues into micelles without dissolving PMMA, much like when tackling hairspray residue on acrylic. The key variables are temperature, dwell time, and how you wipe.
- Fill a basin with 30°C to 45°C (86°F to 113°F) water, then add a few drops of mild dish soap.
- Rinse the acrylic first to remove grit, then submerge it for 15 to 30 minutes.
- While still submerged, wipe with a clean microfiber cloth using light pressure, and re-fold often.
- Rinse thoroughly with clean lukewarm water until it “sheets” evenly.
- Dry by blotting with microfiber, then air dry to reduce static and re-deposition.
Common mistakes are using hot water, scrubbing a dry surface, and letting soap dry on the acrylic. Soap residue can mimic haze, especially on glossy PMMA.
Using a Microfiber Cloth Without Creating Haze
Section titled “Using a Microfiber Cloth Without Creating Haze”Microfiber reduces scratch risk because it lifts contamination into the fiber matrix instead of pushing it across the surface. The practical limit is that microfiber can still scratch if it traps abrasive dust, or if the cloth is low quality and has stiff filament ends.
Use multiple cloths or rotate to clean sections frequently, and avoid fabric softener when laundering. If an acrylic piece is visibly dusty, rinse first rather than wiping dry.
Removing Cloudy Hairspray Haze (Decision Tree)
Section titled “Removing Cloudy Hairspray Haze (Decision Tree)”Start with the least aggressive method that can plausibly work, then escalate only if you see improvement but incomplete removal.
Step 1: Soap-only path (preferred)
Section titled “Step 1: Soap-only path (preferred)”If the haze changes significantly when wet, you are usually dealing with a surface film. Use the Dawn soak, then repeat once if the first pass removes some haze but leaves patchiness.
For installed items, use the soapy compress method, keep it wet for 30 to 60 minutes, then wipe gently. Repeat compress cycles rather than scrubbing harder.
Step 2: Oil-assisted path (for aged, glossy film)
Section titled “Step 2: Oil-assisted path (for aged, glossy film)”If soap removes some buildup but leaves a slick, uneven shine or persistent fog, a small amount of mineral oil can plasticize the hairspray film and reduce cohesion, an approach often used in safe chemical cleaning of acrylic like in safe chemical cleaning of acrylic. Apply a few drops to a microfiber cloth, spread a very thin layer, wait 3 to 5 minutes, then wash immediately with dish soap to fully emulsify and remove the oil.
Do not leave oils on acrylic long-term in bathrooms, because they can trap dust and make the next haze episode worse. If the acrylic has seams, labels, or adhesive pads, keep oil away from those zones.
Step 3: Polish path (only if residue is gone)
Section titled “Step 3: Polish path (only if residue is gone)”If the surface looks equally cloudy wet and dry, and soap plus oil do not change it, you are likely seeing micro-scratching or chemical attack rather than hairspray film. At that point, cleaning chemistry will not fix optics, polishing may.
For polishing options and scratch removal systems, reference Novus. Keep polishing as a last step because it removes material and can change gloss uniformity.
Unsafe Cleaners for Acrylic (Alcohol, Ammonia, “Glass Cleaner,” and Solvents)
Section titled “Unsafe Cleaners for Acrylic (Alcohol, Ammonia, “Glass Cleaner,” and Solvents)”Alcohols (isopropyl alcohol, ethanol, denatured alcohol, many disinfecting wipes) can induce stress cracking in PMMA. The mechanism is solvent absorption into the surface, localized swelling, and rapid stress relaxation that creates crazing, particularly near fasteners, bends, thin edges, and injection molded corners.
Ammonia-based glass cleaners can also promote chemical stress cracking and cumulative haze. Even “ammonia-free” glass cleaners are risky because many contain alcohols, glycol ethers, or other solvent packages intended for glass oils and inks.
Acetone, MEK, lacquer thinner, and many adhesive removers can directly dissolve or craze PMMA quickly. Avoid any product marketed as a “solvent cleaner,” and avoid abrasive powders and melamine sponges that convert clarity loss into permanent micro-scratching.
Can I use alcohol on acrylic? (40-word answer)
Section titled “Can I use alcohol on acrylic? (40-word answer)”Avoid alcohol on acrylic (PMMA). Isopropyl and ethanol can penetrate the surface and trigger stress cracking (crazing), especially on thin or stressed parts like clips and corners. If you must disinfect, use soap and water, then a PMMA-labeled cleaner.
Polishing Out Chemical Etching (Limits and Safety)
Section titled “Polishing Out Chemical Etching (Limits and Safety)”Polishing compounds can improve appearance if the damage is shallow surface haze, light micro-scratching, or minor chemical frosting. Polishing cannot repair crazing because cracks propagate below the surface and scatter light from within the part.
Treat polishing as cosmetic and thickness-removing. If an item is load-bearing, thin, or already shows cracks near stress points, aggressive polishing can reduce safety margin by thinning the section and increasing notch sensitivity.
If you polish, start as mild as possible and stop once clarity stops improving. When the cloudiness is accompanied by visible crack lines, whitening at bends, or “spiderweb” features, replacement is typically the safer option.
Real-World Examples: Cheap vs Premium Acrylic
Section titled “Real-World Examples: Cheap vs Premium Acrylic”A low-cost molded acrylic organizer often contains higher residual stress due to fast cycle times, sharp corners, and minimal annealing. In practice, the same alcohol wipe that “seems fine” on a thick cast acrylic shelf can craze the thin molded piece within days, often first showing whitening around clips and screw bosses.
Premium cast acrylic (thicker, better edge finishing, sometimes annealed) usually tolerates gentle cleaning well and is less prone to stress cracking from incidental exposures. That does not make it solvent-proof, it means the time-to-failure is longer and the safe cleaning window is wider.
If two acrylic items in the same bathroom respond differently, assume differences in stress state and manufacturing method, not differences in how “dirty” they are. Clean both using the least aggressive method.
Prevention: How to Stop Future Hairspray Buildup
Section titled “Prevention: How to Stop Future Hairspray Buildup”Overspray control is more effective than frequent restoration because hairspray films harden with aging. Run the exhaust fan during spraying and for 15 to 20 minutes after, and aim the spray away from acrylic shelves and frames.
Create a temporary barrier, a towel draped over acrylic storage, or move portable organizers out of the spray zone. If you use hairspray daily, a weekly wipe with mild soapy water prevents polymer film aging and makes removal nearly effortless.
To reduce static-driven dust that bonds into the film, dry by blotting and consider an acrylic-safe anti-static product designed for plastics. Dryer sheets can leave residue that attracts grime over time, so use them cautiously and test first.
FAQ: Quick Answers About Hairspray and Acrylic
Section titled “FAQ: Quick Answers About Hairspray and Acrylic”Why is my acrylic still cloudy after soap and water?
Section titled “Why is my acrylic still cloudy after soap and water?”Either soap residue dried on the surface, or the cloudiness is not film. Rinse thoroughly and check the surface wet versus dry, if it stays equally cloudy, you are likely seeing micro-scratching or chemical haze that may require polishing.
Can hairspray permanently damage acrylic?
Section titled “Can hairspray permanently damage acrylic?”Most hairspray causes removable film rather than permanent PMMA damage. Permanent haze is more commonly caused by incompatible cleaners (alcohol, ammonia, strong solvents) or abrasive wiping that micro-scratches the surface.
Is vinegar safe for acrylic?
Section titled “Is vinegar safe for acrylic?”Diluted white vinegar is usually compatible with PMMA and can help with light buildup, including when removing hairspray buildup from acrylic. Avoid strong concentrations on unknown coatings, and rinse if the acrylic has printed graphics, seams, or adhesive-mounted hardware.
What if the haze is worst around screws, clips, or corners?
Section titled “What if the haze is worst around screws, clips, or corners?”That pattern suggests stress-related damage (early crazing) rather than hairspray film. Stop using solvents, avoid alcohol and ammonia cleaners, and assess whether the part is structurally compromised.
References
Section titled “References”-
Rohm and Haas Company. “Plexiglas Acrylic Sheet Properties and Care Guide.” Manufacturer documentation on PMMA cleaning and maintenance.
-
Novus Plastic Polish. “Product Technical Information and Application Protocols.” Manufacturer guidance for acrylic restoration products.
-
Journal of Applied Polymer Science. “Stress-Cracking of PMMA Induced by Organic Solvents.” Research on solvent effects on acrylic.
-
American Cleaning Institute. “Consumer Guidance on Surface Compatibility.” Industry recommendations for cleaner selection.
-
Society of Plastics Engineers. “Optical Properties of Polymethyl methacrylate.” Technical review of acrylic material characteristics.
-
Eastman Chemical Company. “Chemical Resistance Guide for Plastic Materials.” Comparative data on cleaner compatibility.