Cleaning Plastic Baseboards Vinyl: The White-Again Routine (Daily to Restoration)
📑 Table of Contents
Why Textured Vinyl Baseboards Trap Dirt
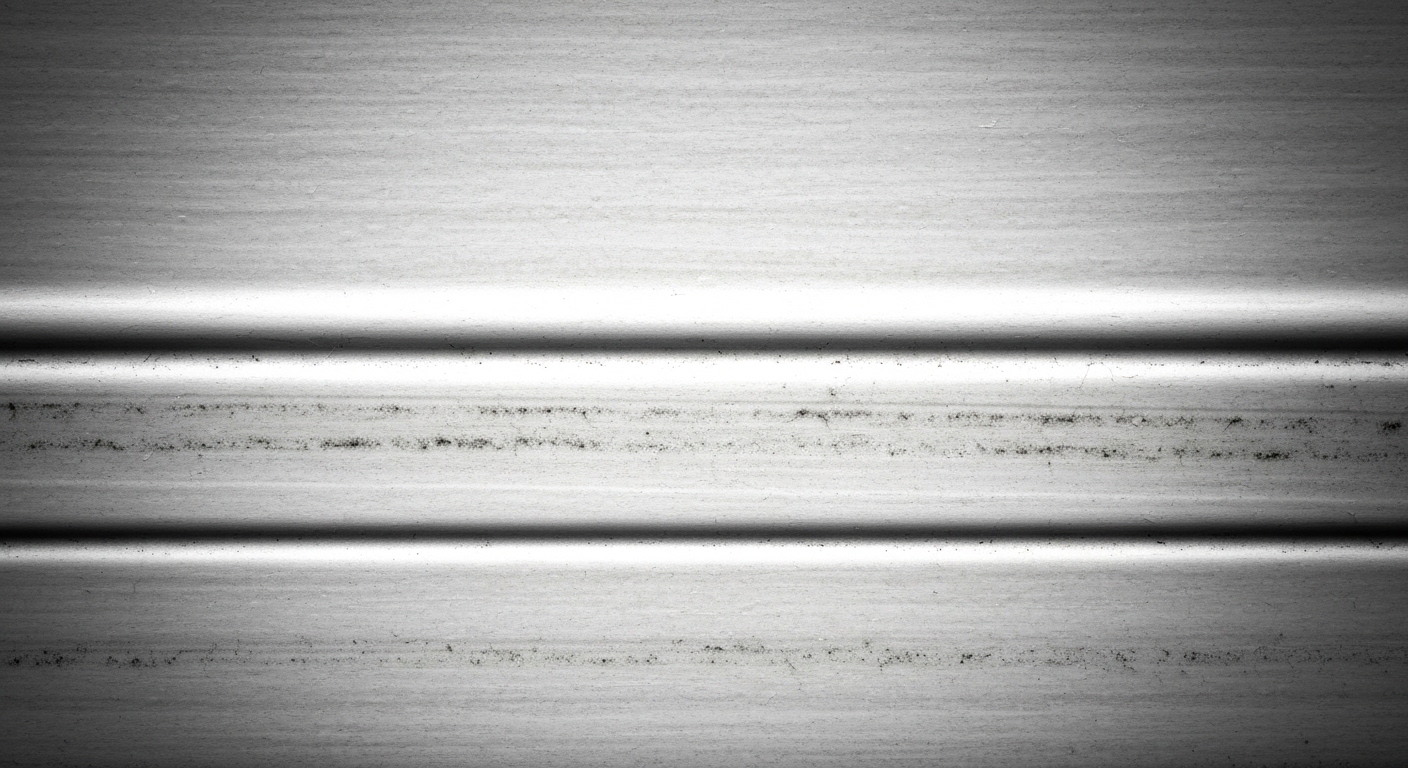
Section titled “Why Textured Vinyl Baseboards Trap Dirt”The textured surface that gives vinyl baseboards their wood-grain look creates a real maintenance challenge. Those grooves and ridges become channels that collect dust, grit, and greasy residue far more effectively than smooth trim.
Texture also creates shadowed low spots where dust settles and bonds. A quick wipe often skims the high points and leaves the grime in the valleys, so the baseboard can look dingy even after you cleaned it.
The fix is simple in concept: use light chemistry to loosen soil, then use the right tool pressure and a brush (when needed) to reach into the grain.
How to Clean Vinyl Baseboards (Quick Steps)
Section titled “How to Clean Vinyl Baseboards (Quick Steps)”- Dry dust first with a microfiber cloth or vacuum brush attachment, especially along textured grooves.
- Wipe with a cleaner suited to the soil (daily vinegar spray for light grime, dish soap for general soil, degreaser for kitchen film).
- Detail the texture with a soft brush if the grain still looks gray.
- Spot-treat scuffs with a white eraser, then escalate to melamine foam only when needed.
- Dry buff with a clean cloth, then optionally wipe once with a used dryer sheet to reduce static and slow dust return.
The White-Again Routine Hierarchy (Daily, Monthly, Annual, Restoration)
Section titled “The White-Again Routine Hierarchy (Daily, Monthly, Annual, Restoration)”Vinyl baseboards stay bright when you treat them like a routine, not a once-a-year project. The goal is to stop oily dust from building into that gray film, and to limit abrasion so the finish stays even.
Daily or Weekly (2 to 5 minutes)
Section titled “Daily or Weekly (2 to 5 minutes)”Use this level for visible dust, mop splash, and light fingerprints. If you mop regularly, a quick baseboard pass prevents the classic dirt line from forming where dirty water dries on the vertical surface.
The Vinegar Water Spray for Daily Grime
Section titled “The Vinegar Water Spray for Daily Grime”Mix one part white vinegar with three parts water in a spray bottle. Vinegar is a mild acid, which helps loosen mineral haze and some light greasy grime without leaving a soapy residue on vinyl.
For compatibility, vinyl itself generally tolerates diluted vinegar well, especially for wipe-and-dry maintenance. Avoid soaking seams, and do not spray directly into gaps where it can run behind trim or into flooring edges.
Vinegar can be a problem around exposed metal fasteners or staples because repeated wetting can encourage corrosion. If your baseboards have visible brad heads, metal corner beads nearby, or you see rust stains, switch to a pH-neutral option like diluted dish soap.
Monthly (10 to 25 minutes, whole house)
Section titled “Monthly (10 to 25 minutes, whole house)”Monthly is when you reset the texture. This is also when I recommend addressing static, because vinyl tends to hold a charge and that charge pulls dust and pet hair right back onto the trim.
The Dryer Sheet Dust-Repellent Hack
Section titled “The Dryer Sheet Dust-Repellent Hack”Used dryer sheets provide a surprisingly effective anti-static treatment that reduces dust attraction on vinyl baseboards. Vinyl, being plastic, can develop static charge through normal movement of air, foot traffic, and dry indoor conditions.
Dryer sheets contain anti-static compounds designed to reduce static cling on fabrics. Wiping a clean, dry baseboard with a used sheet leaves a very thin coating that can keep dust from clinging as aggressively for a few weeks.
If anyone in the home is sensitive to fragrance, choose unscented dryer sheets, or skip this step and rely on routine microfiber dusting.
The Deep Scrub Detail Method (for texture)
Section titled “The Deep Scrub Detail Method (for texture)”For thoroughness beyond routine wiping, a detailed scrub reaches the contamination hiding in the grain. Apply your cleaner to a cloth or directly to a soft brush, then work along the texture so the bristles reach into the grooves.
Wipe away the suspended soil with a clean microfiber cloth, and refresh the cloth often so you do not redeposit grime. When you are done, dry buff, since leftover moisture can attract dust and create streaking.
Annual (30 to 90 minutes, targeted areas)
Section titled “Annual (30 to 90 minutes, targeted areas)”Annual maintenance is where you handle the “why is this still gray” zones, plus small repairs that keep dirt from collecting. Focus on corners, behind doors, near HVAC registers, and any baseboards near sunny windows.
Fixing Corner Gaps from Expansion and Contraction
Section titled “Fixing Corner Gaps from Expansion and Contraction”Vinyl baseboards expand and contract with temperature changes, so gaps at inside corners and joints are common. These gaps catch dust and look worse over time, even if you clean perfectly.
Use a flexible caulk designed for vinyl or plastics, so it can move with the material instead of cracking. Match the caulk color to the baseboard when possible, and keep the bead small to reduce dirt-catching edges.
Why Caulk Cracks on Plastic Boards
Section titled “Why Caulk Cracks on Plastic Boards”Standard caulk often cracks where it meets vinyl due to adhesion problems and differential movement. Vinyl has low surface energy, which makes it resist bonding, similar to why paint can peel off unprepped vinyl.
Choosing a caulk formulated for plastics improves adhesion. Silicone generally adheres better to vinyl than basic acrylic caulk, but always check paintability if you plan to paint later.
Best Cleaners for Vinyl Baseboards Compared
Section titled “Best Cleaners for Vinyl Baseboards Compared”Different soils respond best to different cleaners. Greasy dust, rubber scuffs, and UV yellowing are three separate problems, so the “best cleaner” depends on what you are seeing.
| Cleaner | Pros | Cons | Best for | Avoid when |
|---|---|---|---|---|
| Vinegar and water (1:3) | Low residue, good for light grime and mop haze, inexpensive | Not ideal for heavy kitchen grease, repeated wetting near metal can encourage corrosion | Daily or weekly wipe-downs | Exposed fasteners, rust-prone areas, natural stone nearby that could be splashed |
| Dish soap and warm water | pH-neutral, gentle, good on general soil and light grease | Can leave residue if overused, needs a clean-water rinse wipe | Monthly cleaning, family traffic areas | When you cannot rinse or buff dry |
| All-purpose cleaner (pH-neutral) | Convenient, designed for mixed soils | Some leave fragrance residue, not always strong enough for grease | Whole-house monthly resets | Strongly alkaline formulas on glossy finishes if they haze |
| Degreaser (kitchen-safe) | Cuts cooking film fast, lifts sticky soil in texture | Can dull finishes if too strong, often needs rinsing | Kitchen baseboards, near stove and trash area | Frequent use on delicate glossy trim |
| Melamine foam (Magic Eraser) | Excellent on scuffs and embedded marks, fast results | Micro-abrasive, can dull sheen and change texture with repeated use | Spot treatment for scuffs and stubborn marks | Routine whole-baseboard cleaning, printed or woodgrain-finished trim |
Removing Vacuum Cleaner Scuffs
Section titled “Removing Vacuum Cleaner Scuffs”The black marks left by vacuum contact are usually rubber transfer from wheels and bumpers. It is common, and it is fixable without harsh chemicals.
Start with a standard white eraser. The eraser material lifts transferred rubber while being gentle on the vinyl beneath, although heavy marks can take patience.
If the eraser is not enough, melamine foam can remove the scuff by abrading away the transfer along with a microscopic layer of the surface. Prevention comes down to technique and equipment, so try to avoid bumping baseboards in the first place.
Using Magic Eraser on White Vinyl (Decision Rule)
Section titled “Using Magic Eraser on White Vinyl (Decision Rule)”Magic Eraser is melamine foam that works through fine abrasion, not chemical action. That is why it is so effective, and also why it can change sheen over time.
Here is the practical decision rule I use in client homes: use melamine foam for spot problems, not for whole-room maintenance. If you find yourself needing it more than about once a month in the same section, switch tactics and address the cause (mop line, kitchen grease, vacuum scuffs, or a cleaner leaving residue).
White, solid vinyl tolerates melamine better than printed or coated finishes, because removing a tiny amount of surface still reveals white beneath white. Still, use light pressure, keep the foam damp (not dripping), and test in an inconspicuous area if the trim has a noticeable gloss.
If you want a less abrasive option first, try warm water with a drop of dish soap and a microfiber cloth, followed by a soft brush for texture. Many “mystery marks” lift once the oily binder is removed.
Cleaning Kitchen Grease off the Grain
Section titled “Cleaning Kitchen Grease off the Grain”Kitchen baseboards collect aerosolized cooking grease that traps dust and turns into sticky gray buildup. This soil behaves differently than dry dust in bedrooms or hallways.
Dish soap gives mild degreasing, while a kitchen-safe degreaser handles thicker film. Warm water helps because it softens fats and lowers oil viscosity, making it easier to lift grime out of the texture.
Work in small sections, and follow with a clean-water wipe so you do not leave degreaser behind—an approach that also complements techniques for restoring yellowed vinyl with retrobrighting and UV protection. Dry buffing at the end helps prevent fast re-soiling.
Why Mopping Leaves a Dirt Line at the Base
Section titled “Why Mopping Leaves a Dirt Line at the Base”That tide mark is suspended soil in mop water depositing on the baseboard, much like the grime that builds up during cleaning and whitening plastic vent covers when residue settles over time. When the water evaporates, the dirt stays, and repeated mopping builds the line layer by layer.
The prevention strategy is simple: keep mop water cleaner by changing it more often, and do a quick baseboard wipe after mopping. If you only do one baseboard habit, make it this one, since it stops the most visible grime pattern.
Removing Pet Hair Static
Section titled “Removing Pet Hair Static”Pet hair clings to vinyl baseboards largely through static attraction. Light hair sticks tenaciously to charged plastic surfaces, and wiping can smear it around instead of lifting it.
Vacuuming with a brush attachment removes hair more effectively than dry wiping. After cleaning, an anti-static step like a used dryer sheet can reduce re-attachment, especially during dry winter months.
How to Prevent Vinyl Baseboards from Yellowing
Section titled “How to Prevent Vinyl Baseboards from Yellowing”Yellowing is usually driven by UV exposure, heat, and oxidation of the vinyl material or additives. That is why baseboards near sunny windows or heat registers often change color faster than trim in shaded rooms.
The most effective prevention is reducing UV and heat load. Use curtains or blinds consistently, and consider clear UV-filter window film in rooms with strong sun exposure, especially where the baseboards get direct light.
Cleaning frequency also matters because oily dust can discolor as it oxidizes and it makes existing yellowing look worse. Routine wiping, keeping the surface dry, and avoiding harsh chemicals helps the vinyl age more evenly.
Restoring Yellowed Baseboards with Peroxide (What Works, What Doesn’t)
Section titled “Restoring Yellowed Baseboards with Peroxide (What Works, What Doesn’t)”White vinyl baseboards that have yellowed from UV exposure or age can sometimes be lightened using hydrogen peroxide. The idea is controlled oxidation, where peroxide breaks down some discoloration compounds near the surface.
Start with 3 percent peroxide (drugstore strength) on a cloth for a test patch. Apply to the yellowed area, keep it lightly wet for 20 to 30 minutes, then wipe and rinse with plain water, since leftover peroxide can keep reacting and may create uneven light spots.
For stubborn yellowing, some restorers use higher strengths (often 6 to 12 percent), but the risk rises with strength. Higher concentrations can lighten unevenly, dry out some finishes, and irritate skin and eyes, so gloves and good ventilation are non-negotiable.
Sunlight can enhance results because UV accelerates the peroxide reaction, which is why outdoor plastic restoration methods sometimes work well. That said, indoor baseboards are easy to overdo, so treat small sections and check progress often.
Peroxide can be repeatable if the yellowing is mostly on or near the surface. If the discoloration has progressed through the material, or the vinyl formulation has changed color internally, peroxide may plateau, and painting or replacement becomes the realistic fix.
For background on UV-driven yellowing in plastics, see this related case study on Yellowing, which focuses on sun-damaged outdoor resin.
Painting Vinyl Baseboards: The Prep
Section titled “Painting Vinyl Baseboards: The Prep”Paint can restore yellowed or damaged vinyl baseboards, but success depends on preparation. Vinyl has low surface energy, so many paints peel if you skip the bonding steps.
Clean thoroughly to remove all contamination, then wipe with isopropyl alcohol to remove remaining oils. Lightly scuff with fine-grit sandpaper to create mechanical tooth, then use a plastic-bonding primer designed for vinyl.
That primer step is what keeps the paint from scratching off later. Once primed, use a durable trim paint and allow full cure time before heavy cleaning.
Common Vinyl Baseboard Cleaning Mistakes
Section titled “Common Vinyl Baseboard Cleaning Mistakes”A lot of baseboard frustration comes from products that either damage the surface or leave residues that attract dirt.
Bleach is a common misstep because it can lighten stains but also degrade some plastics and additives over time, and it does not remove oily grime well. Strong solvent-based cleaners (like acetone, lacquer thinner, or aggressive adhesive removers) can soften or warp vinyl, and they can permanently alter sheen.
Steam mops can also cause problems when steam is directed at seams or caulk lines, since heat and moisture can push grime into gaps, weaken some caulks, and contribute to warping or separation. Excessive abrasion is another issue, since repeated scrubbing with rough pads can create dull patches that trap dirt faster.
If you are unsure about a product, test in a hidden area and choose the mildest option that does the job. Vinyl responds best to gentle chemistry plus the right tool for the texture.
Summary: The White-Again Baseboard Routine
Section titled “Summary: The White-Again Baseboard Routine”White vinyl baseboards stay bright when you manage three things: texture trapping, static attraction, and oily buildup from mopping and kitchens. Daily or weekly wipe-downs prevent the dirt line, monthly texture detailing resets the grain, and annual touch-ups handle gaps and stubborn zones.
For scuffs, start gentle with an eraser, then use melamine foam sparingly as a spot tool. For yellowing, peroxide can help when the discoloration is near the surface, but deeper oxidation may require paint or replacement.
Can you use Magic Eraser on vinyl baseboards?
Section titled “Can you use Magic Eraser on vinyl baseboards?”Yes, but treat it as an occasional spot tool. Melamine foam is micro-abrasive, so repeated use can dull glossy vinyl or subtly change the texture, especially if you scrub hard.
How do you whiten yellowed vinyl trim?
Section titled “How do you whiten yellowed vinyl trim?”Try a test patch with 3 percent hydrogen peroxide, keep it lightly wet for 20 to 30 minutes, then wipe and rinse. Repeat if you see improvement, but if yellowing is through the material, the practical fixes are paint (with proper vinyl primer) or replacement.
References
Section titled “References”-
Vinyl Institute. “Vinyl Surface Care Guidelines.” Industry guidance on vinyl maintenance.
-
American Cleaning Institute. “Baseboard Cleaning Methods.” Consumer guidance on cleaning.
-
Extension Services. “Home Cleaning Guide.” Educational resources on household maintenance.
-
Society of Plastics Engineers. “PVC Properties.” Technical information on vinyl materials.
-
Consumer Reports. “Home Maintenance Guide.” Consumer guidance on home care.