Cleaning Yellowed Keyboard Caps - PBT vs ABS Keycap Restoration
📑 Table of Contents
The Nicotine-Colored WASD Problem
Section titled “The Nicotine-Colored WASD Problem”If your keycaps look “smoker yellow” but don’t feel dirty, you are usually dealing with two different issues that get lumped together, grime (oils and dirt) and true yellowing (polymer oxidation). This page is the keycap-specific protocol, with legend safety, stabilizers, and spacebar unevenness front and center, and it pairs well with broader guidance on preventing keyboard plastic yellowing.
For the general ABS yellowing science that also applies to consoles, appliances, and housings, use this guide on the safest way to restore yellowed plastic. If you want to prevent desk-light UV exposure between sessions, a simple cover helps, and you can pair this with a keyboard dust cover for long-term color stability.
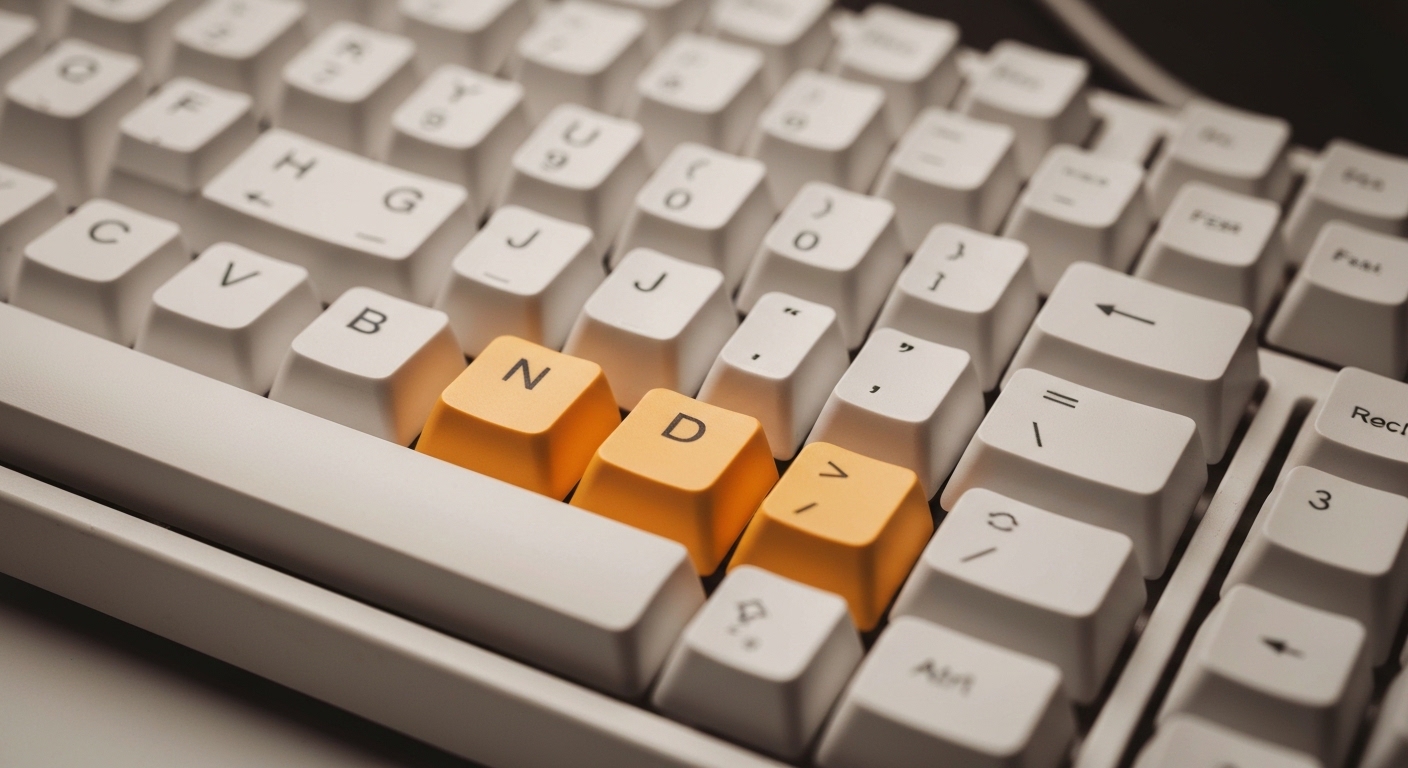
How to Clean Yellowed Keycaps (ABS vs PBT)
Section titled “How to Clean Yellowed Keycaps (ABS vs PBT)”- Confirm yellowing vs grime, wipe one cap with warm soapy water and dry, if the color is unchanged, it is oxidation.
- Identify ABS vs PBT (ABS shines and wears glossy, PBT stays textured and is harder to yellow).
- Pull caps safely, keep stabilizer parts organized, and remove any foam, pads, or lube-contaminated inserts.
- Wash all caps in warm water (40 to 50°C) with dish soap, brush textured tops and rinse clean.
- Degrease with 70% IPA only if the legends and coatings can tolerate it, use short dwell and wipe dry.
- If caps are ABS and still yellow, retrobright with hydrogen peroxide plus UV using 3 to 12% peroxide parameters.
- Rinse thoroughly, do a final soap wash to remove residues, then air-dry 24 hours before reinstall.
- Prevent return yellowing, reduce UV exposure (window light, desk lamps), and store or cover the keyboard.
| Method | Removes | Best for | Risks |
|---|---|---|---|
| Warm water + dish soap | Dirt, skin oils, food dust | All keycaps | Minimal, avoid hot water and long soaks for ABS |
| 70% IPA wipe | Oil film, sticky grime | Double-shot legends, bare plastic | Can fade pad print, can haze soft-touch coatings |
| Mild APC (diluted) | Heavy grime, smoke residue | Tough PBT, durable ABS | Can attack coatings, can leave residue if not rinsed |
| Melamine sponge (caution) | Surface staining, shine reduction attempts | Only on unprinted, uncoated caps | Micro-abrasion, kills legends, changes texture |
| Peroxide cream (developer) | ABS yellowing | Large caps, selective areas | Streaks, blotches, dry spots, heat spots |
| Peroxide bath | ABS yellowing | Many small caps at once | Floating, bubble shadows, overexposure if too hot |
Quick Fix Checklist (Cleaning vs Yellowing)
Section titled “Quick Fix Checklist (Cleaning vs Yellowing)”Use this 60-second decision tree before you touch solvents or peroxide.
If the cap feels tacky, oily, or has visible dirt in texture, you are cleaning. If the cap is clean but uniformly tan or patchy yellow, especially on the spacebar, you are dealing with oxidation and cleaning alone will not reverse it.
If the set is PBT and yellow, treat it as “stained or contaminated” until proven otherwise, because true PBT yellowing is uncommon. If the set is ABS and yellow, retrobrighting can work, but results vary by formulation and the yellow can return.
PBT vs ABS Keycaps (Material ID That Actually Matters)
Section titled “PBT vs ABS Keycaps (Material ID That Actually Matters)”The two common keycap plastics are PBT and ABS, and they age differently. ABS is easier to mold and common on stock boards, but it photo-oxidizes readily under UV and heat, so it yellows sooner.
PBT is more color-stable and keeps its texture longer, which is why enthusiast sets use it. The chemistry is the culprit, ABS contains butadiene segments that oxidize into colored chromophores, while PBT’s backbone is less susceptible.
Fast ID checks
Section titled “Fast ID checks”ABS tends to develop shine on the home row and spacebar, and the sound is sharper when you tap it. PBT usually stays matte and has a slightly deeper sound.
If you have a known brand set, check the product page or packaging, because blends exist and some “PBT” caps are mixed materials. When you cannot confirm legends or coatings, treat the set as delicate and avoid alcohol and abrasives until tested.
Stop Sign: Why Custom Keycaps Are Different
Section titled “Stop Sign: Why Custom Keycaps Are Different”Before chemicals, identify what you are about to remove color from, because some “restoration” methods strip legends or haze coatings.
Double-shot legends are molded plastic and handle soap, brushing, and brief IPA well. Dye-sub legends are generally durable but can shift if you get aggressive with strong solvents or high heat.
Pad-printed legends and UV-printed legends can wipe off with IPA, and some will soften with APC or prolonged soaking. Soft-touch, rubberized, or coated caps can haze, swell, or turn patchy with alcohol, and artisan resin caps can discolor or craze with peroxide and UV.
If you cannot identify the legend type, clean with dish soap and a brush first, then test any solvent on the underside of one cap; if you’re considering retrobright, review the basics of ABS plastic retrobrighting chemistry beforehand. For resin artisans, do not retrobright—clean gently with mild soap and cool water only.
Keycap Puller Safety (Stabilizers Included)
Section titled “Keycap Puller Safety (Stabilizers Included)”Use a wire keycap puller when possible, it applies even force and avoids gouging. Pull straight up, do not rock the cap, and do not pry against the switch housing.
For stabilizer keys (spacebar, enter, shifts), expect more resistance and lift evenly. If you feel binding, stop and inspect the stabilizer type (Cherry style clip-ins vs Costar wire) so you do not bend the wire or crack the stem.
Cleaning That Actually Works (Grime, Oils, “Cheeto Dust”)
Section titled “Cleaning That Actually Works (Grime, Oils, “Cheeto Dust”)”Textured keycaps trap particulate in the grain, so wiping does almost nothing. You need warm soapy water plus agitation, either a soft detailing brush, a toothbrush, or an ultrasonic cleaner.
Mix a sink or tub with 40 to 50°C water and a few drops of dish soap, soak for 15 to 30 minutes, then brush the tops and sides. Rinse until the water sheets clean, because soap film in textured materials attracts dirt fast, especially when you understand how different plastics yellow under UV and hold onto residues differently over time.
Safe temperatures for soaking and drying
Section titled “Safe temperatures for soaking and drying”Avoid boiling water and avoid dishwasher heated dry. ABS can warp under heat, especially long keys, and stems can deform if the cap is stressed while warm.
After rinsing, shake water out of the stems and place caps stem-down on a towel for airflow. Give them a full 24 hours to dry if you do not have forced air, trapped water in stems is what ends up inside switches.
Isopropyl Alcohol: The Legend (Use It Like a Technician)
Section titled “Isopropyl Alcohol: The Legend (Use It Like a Technician)”IPA is for degreasing, not for “deep cleaning” everything. It dissolves skin oils and sticky residue fast, but it can also attack coatings and printed legends.
Safe-use mini-protocol
Section titled “Safe-use mini-protocol”Use 70% IPA for most keycap degreasing, it is effective and less aggressive than 99% for plastics. Apply to a microfiber or lint-free cloth, wipe the cap, and keep dwell under 30 to 60 seconds before wiping dry.
Do not soak keycaps in IPA. Do not use IPA on pad-printed legends, soft-touch coatings, or unknown custom caps without an underside test.
What Cleaning Cannot Fix (Yellowing vs Shine)
Section titled “What Cleaning Cannot Fix (Yellowing vs Shine)”Yellowing is a chemistry problem in the plastic, cleaning removes contamination but does not reverse polymer oxidation. Shine on ABS is wear, the surface texture is physically flattened, so no cleaner puts the grain back.
You can matte an unprinted ABS cap with controlled micro-abrasion, but that is a surface refinish job and it changes the feel and thickness. If shine bothers you, the practical move is replacing ABS with PBT for daily use.
Diagnosis: Why the Spacebar Looks Worse
Section titled “Diagnosis: Why the Spacebar Looks Worse”Spacebars often yellow faster because they see more UV and more thermal cycling, and they are sometimes molded in a separate run with a slightly different formulation. They also float in peroxide baths and trap bubbles easily, which causes patchy retrobright results.
Treat long keys as their own project, and plan to control floating, bubbles, and heat during retrobright.
Cleaner and Product Compatibility (Keycap-Focused)
Section titled “Cleaner and Product Compatibility (Keycap-Focused)”Use this table when you are deciding what chemical goes on what cap. “Printed legends” here means pad print or UV print, not double-shot or dye-sub.
| Cleaner or product | What it removes | Safe for ABS | Safe for PBT | Safe for double-shot | Safe for dye-sub | Safe for printed legends | Notes |
|---|---|---|---|---|---|---|---|
| Dish soap + warm water | Dirt, oils, food dust | Yes | Yes | Yes | Yes | Usually | The baseline for every set |
| IPA 70% wipe | Oil film, tack, adhesive residue | Usually | Usually | Yes | Usually | Often no | Test first, avoid on coatings |
| IPA 99% wipe | Same as 70% but faster | Riskier | Riskier | Usually | Usually | Often no | Higher solvent stress, use only when needed |
| Mild APC (pH-neutral, diluted 1:10 to 1:20) | Smoke film, heavy grime | Usually | Yes | Yes | Usually | Maybe | Rinse thoroughly or it leaves haze |
| Melamine sponge | Scuffs, surface staining | Caution | Caution | No | Caution | No | Micro-abrasive, can dull texture and remove legends |
| Peroxide cream (10 to 12% developer) | ABS yellowing | Yes | Not needed | Yes | Yes | Usually | High streak risk if applied uneven |
| Peroxide bath (3 to 6% typical, up to 12%) | ABS yellowing | Yes | Not needed | Yes | Yes | Usually | Bubble and float management is critical |
Retrobrighting Keycaps: Step-by-Step (With Parameters)
Section titled “Retrobrighting Keycaps: Step-by-Step (With Parameters)”Retrobright is oxidation, you are breaking down yellow chromophores in aged ABS. You can get excellent results, but you can also get uneven whitening, streaks, or a chalky look if you overcook it.
If you want the broader context, additives (like flame retardants) and why yellowing returns, read the safest way to restore yellowed plastic. This section stays focused on keycaps, legends, spacebars, and batch variability.
- Sort and pre-clean. Wash caps with dish soap first and dry, peroxide on oily plastic gives blotchy results.
- Choose method (bath vs cream). Use a bath for lots of small caps, use cream for large caps or targeted work, especially spacebars.
- Pick peroxide concentration. Use 3 to 6% for slower, safer control, use 9 to 12% (hair developer range) for faster action with higher risk of unevenness.
- Set up a container. For baths, use a clear glass baking dish or clear poly tub that is peroxide-safe, avoid thin food containers that bow and spill. Fill to fully cover caps with at least 10 to 20 mm of liquid above the tallest cap.
- Prevent floating and bubbles. Place a peroxide-safe plastic grid or a small glass weight on top to keep caps submerged, then tap or stir to release bubbles from stems and underside cavities.
- UV source options. Sunlight works, but control heat, keep the bath under about 35°C. For indoor control, use a 365 nm UVA LED flood or strip lights in a lined box, or a UV nail lamp if it is true UVA and coverage is even.
- Agitate and rotate. Gently stir or reposition caps every 20 to 30 minutes for the first hour, then every 60 minutes. This prevents shadowing and reduces streaks.
- Time checks and stop conditions. Start checking color at 30 to 60 minutes, then hourly, most keycaps land in 2 to 8 hours depending on yellow level and UV intensity. Stop if you see chalkiness, surface roughness, or rapid lightening beyond the set’s baseline.
- Rinse and neutral wash. Rinse under cool water, then wash with dish soap again to remove residual peroxide and breakdown products.
- Dry fully. Air-dry 24 hours, stem-down on a towel, then reinstall.
Cream vs submersion (which one for keycaps?)
Section titled “Cream vs submersion (which one for keycaps?)”Cream developer is easier to aim but easier to mess up, uneven thickness equals streaking. Submersion is more uniform on small caps, but long keys float and bubble-shadow.
Choose cream for a single spacebar or when you need to keep legends away from chemical pooling. Choose a bath when you have a full set of ABS caps and you can manage agitation and temperature.
Troubleshooting Retrobrighting (Streaks, Blotches, Uneven Spacebars)
Section titled “Troubleshooting Retrobrighting (Streaks, Blotches, Uneven Spacebars)”| Symptom | Most common cause | Fix | When to stop |
|---|---|---|---|
| Streaks or brush marks | Cream applied unevenly, dry spots under UV | Rewash, reapply cream in a consistent film, wrap in clear plastic to slow drying | If texture changes or looks chalky |
| Blotches or “clouds” | Oils or residues on plastic, uneven UV exposure | Pre-clean again, rotate parts more often, improve reflective lining | If blotches persist after a second controlled cycle |
| Yellow patches in stems or underside | Trapped bubbles in bath, parts floating | Use weights, tap to release bubbles, agitate early and often | If warping starts on long keys |
| Spacebar ends lighter than center | Heat gradient or UV hot spot, stabilizer cavities trapping bubbles | Rotate orientation, shield hot spots, switch to cream with plastic wrap | If the bar begins to twist |
| Chalky, rough surface | Overexposure, too-strong peroxide, too much heat | Stop immediately, rinse, soap wash, accept partial correction | If the surface looks etched |
| Brittleness concerns | Repeated cycles, high peroxide, heat stress | Use lower concentration and longer time, keep under 35°C, limit cycles | If the cap feels weaker or cracks at the stem |
| Warping (long keys) | Heat plus stress, soaking too hot | Keep temp down, support on a flat surface during drying | Immediately, warped caps rarely fully recover |
Before/After Mini Case Studies (Realistic Outcomes)
Section titled “Before/After Mini Case Studies (Realistic Outcomes)”Case 1: Stock ABS set, moderate yellow, full success
Section titled “Case 1: Stock ABS set, moderate yellow, full success”Starting condition was a light tan cast on the entire alphanumeric cluster, with a noticeably darker spacebar. Method was a 6% peroxide bath in a glass dish under 365 nm UVA, with agitation every 30 minutes for the first two hours.
Total time was 5 hours, followed by a soap wash and 24-hour dry. Result was near-original white with minimal variation, spacebar improved but still half a shade warmer than the rest.
Case 2: ABS spacebar only, heavy yellow, partial success
Section titled “Case 2: ABS spacebar only, heavy yellow, partial success”Starting condition was heavy yellowing limited to the spacebar, with the rest of the set acceptable. Method was 12% cream developer, thin even coat, then wrapped in clear plastic to prevent dry streaks under sunlight.
Total exposure was 3.5 hours with flips every 45 minutes to avoid hot spots. Result was a strong improvement, but slight end-to-center mismatch remained, and pushing further started to produce a dry, chalky look, so the job stopped early.
Case 3: PBT set that “looked yellow”, cleaning-only fix
Section titled “Case 3: PBT set that “looked yellow”, cleaning-only fix”Starting condition was a dingy, warm tint mostly on the home row with heavy shine-free texture intact. A warm dish soap soak plus brush work removed embedded oils and dust, then a quick 70% IPA wipe was done only on the underside of one cap as a test.
Total time was 45 minutes plus drying, and the “yellow” was gone because it was contamination, not oxidation. No peroxide was needed, and that is typical for genuine PBT.
Preventing Future Yellowing (Keycap-Specific)
Section titled “Preventing Future Yellowing (Keycap-Specific)”UV is the main driver for ABS yellowing, and desk lamps can be just as bad as window light if they run hot and bright. Keep the keyboard out of direct sun, reduce exposure to UV-heavy lighting, and cover it when you are not using it.
Keep hands clean, because oil film accelerates grime buildup and makes retrobright uneven later. If you store spare sets, keep them in a cool, dark place in breathable bags so trapped moisture does not create odors.
Safety of Chemicals on Hands
Section titled “Safety of Chemicals on Hands”Peroxide developer in the 9 to 12% range can irritate skin and bleach it white on contact. Wear nitrile gloves and eye protection, and do not work over surfaces you care about.
Do not seal peroxide in airtight containers under UV, pressure can build. If you get peroxide on skin, rinse with cool water right away.
DIY UV Box Setup (Keyboard Parts)
Section titled “DIY UV Box Setup (Keyboard Parts)”A workable UV box is a reflective enclosure, a consistent UVA source, and heat control. Use a plastic tote or wood box lined with foil or reflective sheet, then mount 365 nm UVA LED strips or a UVA flood so light hits from multiple angles.
If you use a UV nail lamp, verify it emits UVA and that the coverage is even, otherwise you will create hot spots and uneven retrobright. Keep a thermometer in the box, if you are pushing over 35°C, back off and add ventilation.
FAQ: Yellowed Keycaps & Retrobrighting Safety
Section titled “FAQ: Yellowed Keycaps & Retrobrighting Safety”Does retrobrighting weaken keycaps?
Section titled “Does retrobrighting weaken keycaps?”It can, especially with repeated cycles, high peroxide concentration, and heat. One controlled cycle at 3 to 6% with good temperature control is low risk, but nothing about it is “free.”
Will the yellowing come back?
Section titled “Will the yellowing come back?”Yes, because the underlying ABS chemistry has not changed. You can slow it down with UV avoidance and by covering the board when not in use.
Is retrobrighting safe for PBT keycaps?
Section titled “Is retrobrighting safe for PBT keycaps?”Usually it is unnecessary, and I avoid it unless you have proven true oxidation on a known PBT part. If a PBT set looks yellow, clean it hard first, most of the time it is contamination.
Can I use bleach to whiten keycaps?
Section titled “Can I use bleach to whiten keycaps?”Do not use chlorine bleach, it can attack polymers, damage legends, and create brittle surfaces. Use peroxide if you are doing any whitening chemistry.
Can I use a UV nail lamp for retrobrighting?
Section titled “Can I use a UV nail lamp for retrobrighting?”Yes if it is true UVA output and you can get even coverage. The two problems are hot spots and uneven exposure, so rotate parts and monitor temperature.
What is the safest first step if I am not sure about legends or coatings?
Section titled “What is the safest first step if I am not sure about legends or coatings?”Warm dish soap soak plus brushing, then dry. If you still need degreasing, do a small underside test with 70% IPA before touching the top surface.
References
Section titled “References”-
BASF Plastics. “ABS Material Properties and Aging Behavior.” Technical documentation on ABS stability.
-
Society of Plastics Engineers. “Photo-oxidative Degradation in Consumer Plastics.” Research on yellowing mechanisms.
-
DuPont Engineering Polymers. “PBT Material Properties and Environmental Resistance.” Technical documentation on PBT stability.
-
Keyboard Enthusiast Community. “Retrobrighting Protocols and Results Documentation.” Crowdsourced research on restoration methods.
-
Cherry Corporation. “Keycap Material Specifications and Care Guidelines.” Manufacturer recommendations.
-
Journal of Applied Polymer Science. “Chromophore Formation in Aged ABS Materials.” Research on yellowing chemistry.